During the work week, I didn't have a lot of opportunity to work on the trike, though I did get some done. Friday night and Saturday is when I got to spend a lot of time on it.
While riding *last* weekend, I noticed a small fresh looking pool of brake fluid under the trike after we stopped for fuel. There were no obvious leaks, so we decided to let it go for the moment. During the week, I noticed two things that I think may have been related.
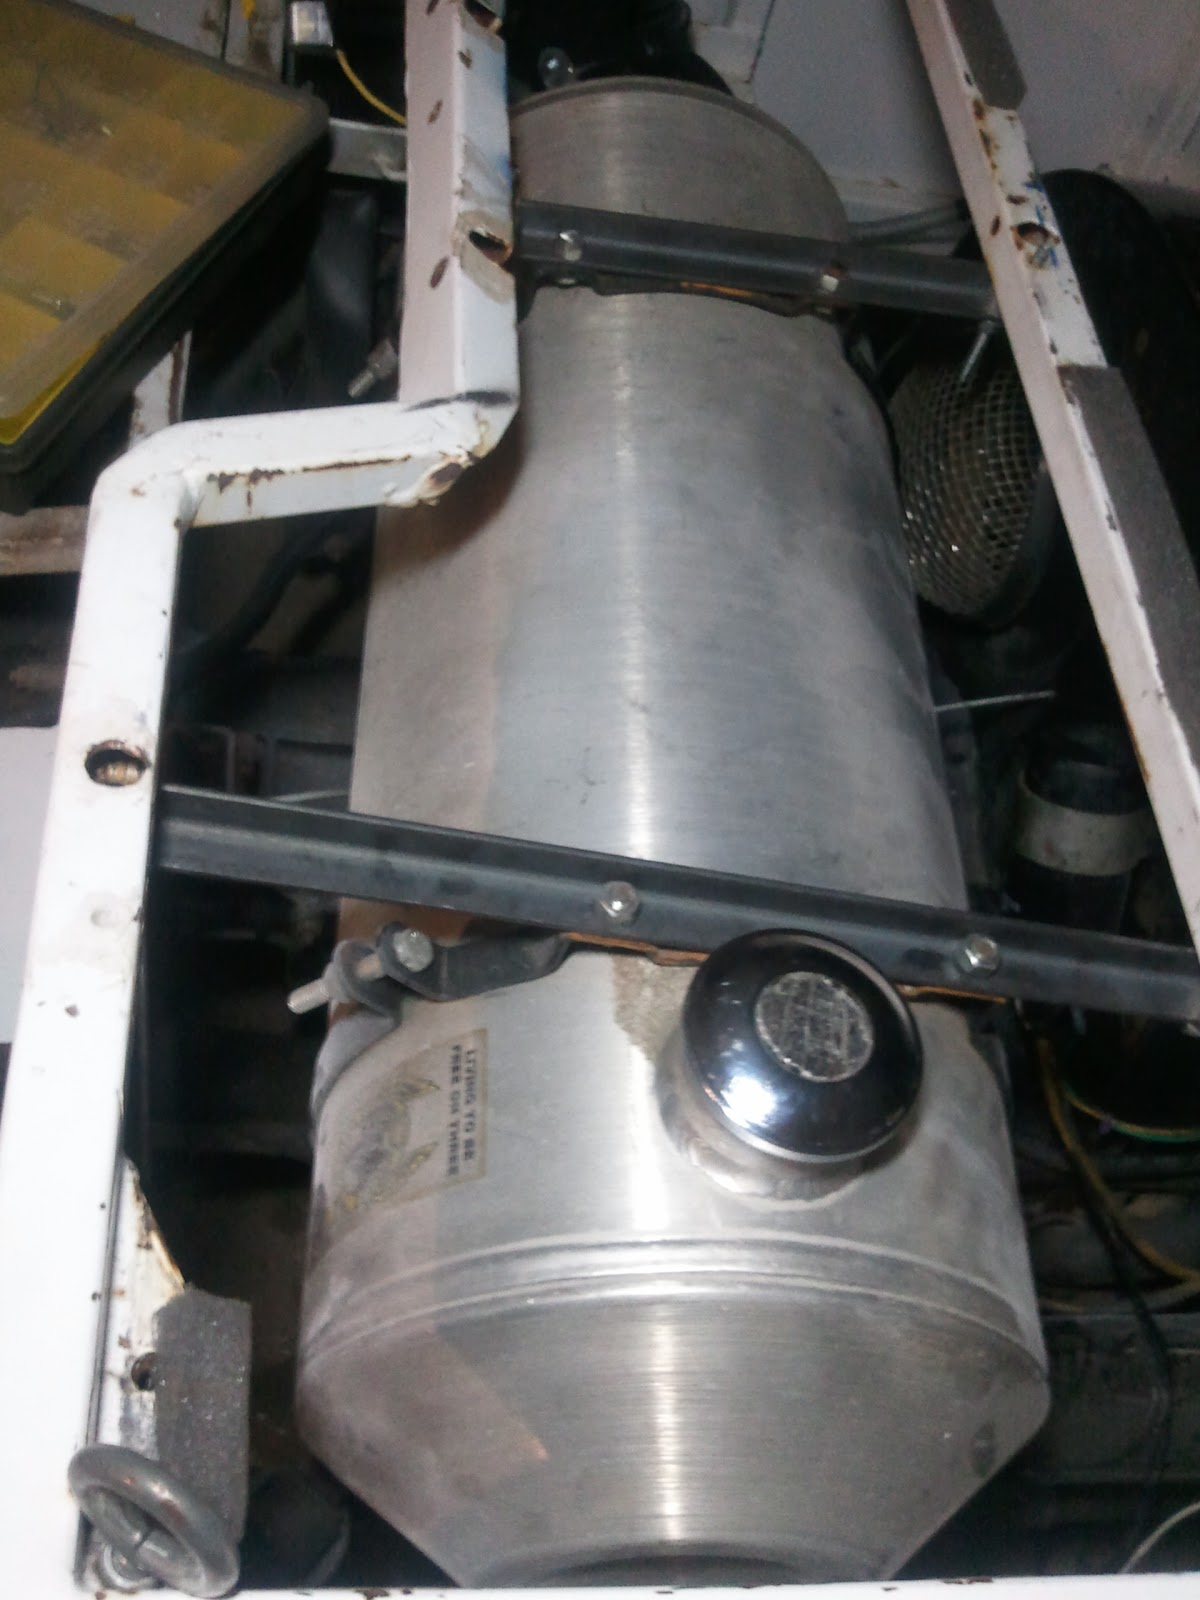
The fuel tank petcock was very close to the clutch slave cylinder, specifically the boot around the shaft..

This pic was taken later and doesn't show that the fuel line was dripping liquid, which turned out to be brake fluid from the cylinder. If you look closely, it does show signs of a leak in the area.
The fuel tank mounting needed to be redone regardless. The brackets it was hanging from were made from flat stock. The weight of the tank, about 50 pounds full, is more than they could take over time.

Note also that the nut one would expect to find on the bolt in the foreground was missing already.

Though it's hard to see in this picture, the left backet is actually curved.
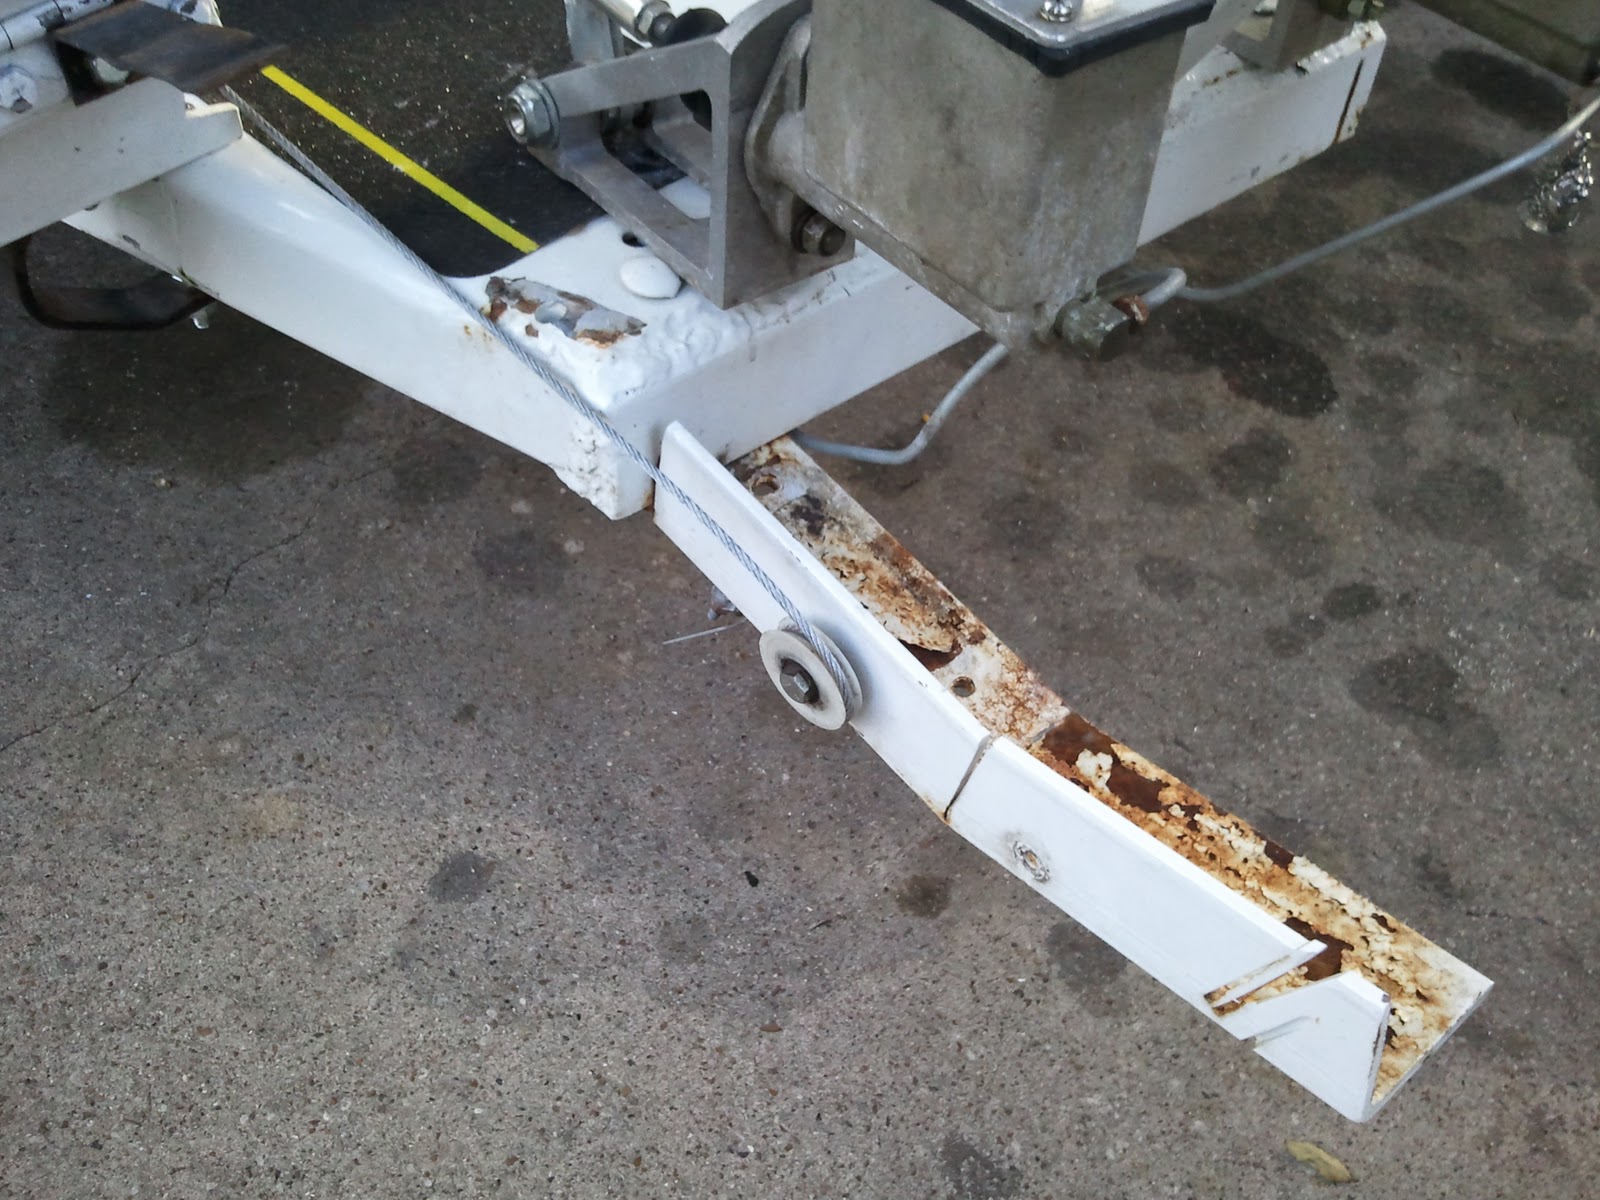
I used a load strap to temporarily support the tank while I removed the old brackets and rebuild them from angle stock. Even with their optimistic choice of flat material, the previous builder apparently did understand the need to offset the holes. Especially with the longer brace, the brace is mounted at a slight angle to the center line of the trike and the tank, while sadly not quite perpendicular to the center line, it it mostly perpendicular. These factors combine to mean that the four holes drilled in the bracket are not along the center line of the bracket. It was easiest to use the old ones as a templates (after flattening them on the anvil) and drill the same relative positions in the new ones.
I think the original trike did not have the relief in the frame for the passenger seat. There is ample evidence that this was cut in and redone. To get the angle more seat-friendly, the center section was angled to the ground. Unfortunately, the front fuel tank mount is on that piece and the angle on the frame piece not only essentially lowers that point by about one inch, but places it at an angle as well. In a more perfect world, I would take time to correct this, and it might be as simple as heating and bending the mounting tab back to level with the ground. This would be enough to get it all the way back to the right height, but it would help. For now, I am just using as it is, which meant having quite a bit of difficulty getting that bolt to line up properly. Alas, I won in the end.

Even with the new rigid brackets in place, this frame issue makes the tank sit not quite level.

It will not be visible once we're done, but it will leave a small bit of fuel inaccessible when it runs very low and it may result in sediment collecting in the tank rather than flowing out and being caught in the filter. Which, by the way, I will have to add. Perhaps most importantly, the tank clears the newly replaced clutch cylinder by a better margin.
The clutch cylinder also got a new bracket that allows it to pull against the transaxle. The old one pulled against the trike frame, which is not a great idea for smooth clutch operation.
One thing I kept in mind while remounting the tank was the position of the filler in the existing (rather ugly) fuel door.

We are keeping this deck material for time being, so we want this thing to look as good as it can. We are using a Bully billet fuel door intended for GM pickups. It has the least extraneous hardware on the back of it, compared to models for Ford and Dodge trucks. :)
I had to line the door up carefully to center the filler cap beneath it and to maximize on holes that would actually be drilled in the deck. I also had to cut out a little bit towards the back of the trike to clear the stop that door rests on when closed. All done, the fuel door looks GREAT and I can only imagine how much better it will look after the deck is painted.

The fuel door is most assuredly the shiniest bit on the trike.
Saturday was a good long workday. I started by rolling the trike out in the driveway and powerwashing everything I could reach, especially on the engine. I used my yard blower to speed dry every nook and cranny, then I remember that I had intended to wet sand all the surfaces. So, that was about an hour and some spots will need touch up sanding, but for the most part it's sanded and it must be extra dry since I had to use the blower a second time :)

Next came the dismantling.
I started with the engine because I knew we'd want all those parts off the trike for their own beautification.

The engine being smaller with all the stuff off it will be easier to mask when we paint the body. With the tins off, I discovered several cooling issues.
First, and not surprisingly, there were mud dauber nests all over fins on the cylinders. I'm not sure what the attraction is to such spots, but it is a common occurrence, especially when one sits unmoved for a long time as this one did.

Also visible in this picture is the infamous under shroud oil cooler that is known for cooling the oil pretty well by stealing the air needed to cool cylinder #3. This will need to be corrected soon, but not this week.
You can't see it in any of the pictures I took, but on the 1-2 side, there was something soft and fluffy, maybe fiberglass, blocking the same center air passage as the mud daubers blocked on 3-4. It was drenched in oil and dirt from some years of operation, so it's not new. I theorize that, at some time in the engine's past, a mouse lived there.
I degreased as best I could with spray chemicals and brushing. What a mess that was, and I'm not truly happy with the results, but I'm on such a tight time budget for this project. Some things just have to wait.
I did mask and shoot the engine block with a coat of paint. The paint looks way more blue than the cap looked in the store. The cap matches it perfectly now, but still, more blue than expected.

I also painted the unremovable pulley, speaking of a project to put off...
I removed the rear bumper, the lights and the little stainless steel plate that I think was originally intended as a place for the inspection sticker, and the wiring harness from the back of the trike.
I ground and sanded the welding bumps left from the expanded metal that had been on the right side of the trike.

That was a mess.
Also removed the extremely ugly bracket that first held the brake pedal (which we moved onto the floor deck a week ago) but cannot yet be eliminated because of the throttle cable routing. Yet another project to delay.
I severely shortened it and rounded all the edges that are exposed and shot it with primer.
I removed the clips holding the wiring harness between the back of the trike and the fuse panel and the entire shifter assembly. I shot some scratched and scraped spots with primer and will need to sand and prime a few more places, as well as wet sand a few previously inaccessible areas.
Finally, I installed a blind nut rivet for one of the "fuel tank" dashboard mounting tabs. It had a bolt simply jammed in the hole before, or at least if there was a nut, it's completely inaccessible now. This was my first try at this fastener and I must admit, I'm impressed. I nabbed this picture of one installed from the web.

I don't think I'd hang the transaxle from one, but it works really well for this application.
Today, more prep and, hope upon hope, shooting some paint...
No comments:
Post a Comment