Thursday, September 25, 2014

Life Happens


I've been away from my two blogs for a little bit, though there have been some developments in both, especially this one.

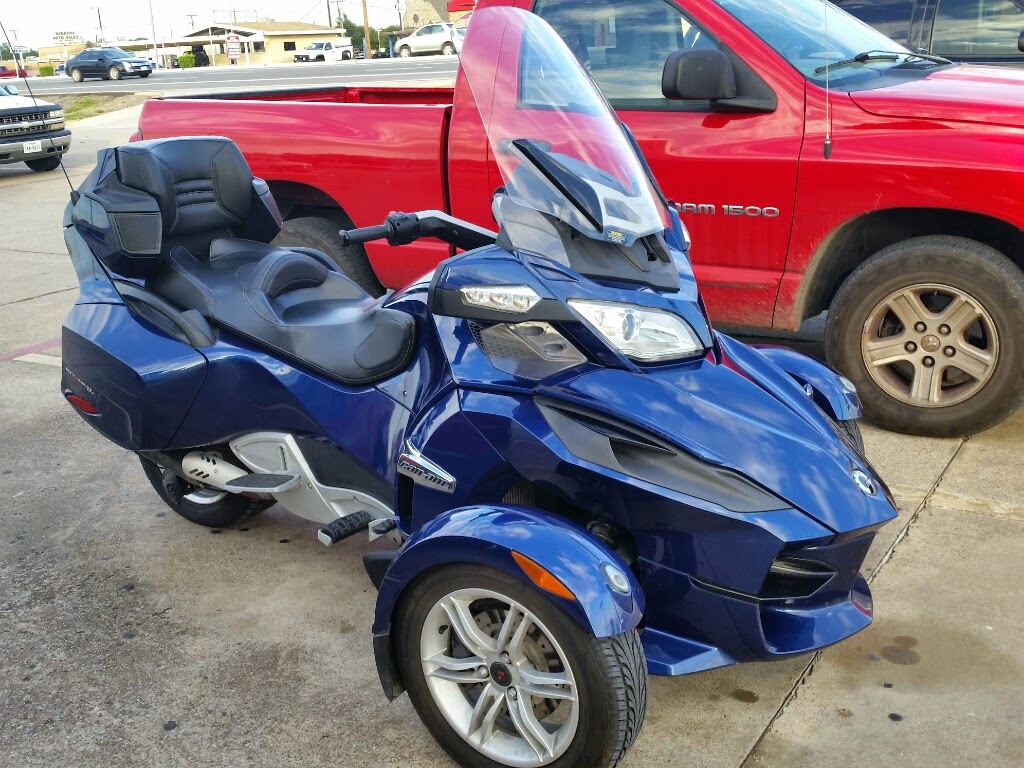
Biggest news, Gabby got a CanAm Spyder RT!


One of her friends at work needed to sell his just as she was shopping for one, so good news for them both. It's a 2010 model with a 5 speed manual transmission. It will flat scoot if you ask it to.

Last time, I was talking about the trials I was facing with the tank that does not end. I requested a quote from Boyd Welding and at just under $200, it is not a cheap tank by any means. It is competitive with commercially available racing fuel cells and none of them are the right shape. In any case, I went for it and it's expected around the end of the first week in October.

Before Labor Day weekend, we participated in school supply benefit run. Kermit had some reliability issues wherein he would occasionally flood out and die at a stop. One of these times involved her being towed the last mile or two to the school, an activity she is glad to never repeat. Long story short, it seems to have been that the 5 PSI fuel pump overwhelmed the 3 PSI float valve. The installation of a fuel pressure regulator seems to have abated the problem.


Since it worked without difficulty for a long time, I suspect the overrating has probably mildly damaged float valve. I have carburetor rebuild kits waiting for me to install them.

That same day, SpongeBob was running ok, but not great. It was taking wide open throttle to reach freeways speeds. I tolerated it for the day, but over the next few days, I did some troubleshooting, including new distributor cap, wires and sparkplugs, to no avail. The troubleshooting seems to indicate that he had lost power in cylinder 4 and that either 3 or 4 was filling with oil when it sat overnight, which can't be good.

I shopped for another engine, and not really finding anything I wanted to pounce on, I decided that I would put the old engine from Kermit in SpongeBob and rebuild SpongeBob's engine. It's a slightly better candidate since it's crankshaft pulley isn't welded on and the mild oil leakage from Kermit's old engine would be tolerable in the short term.

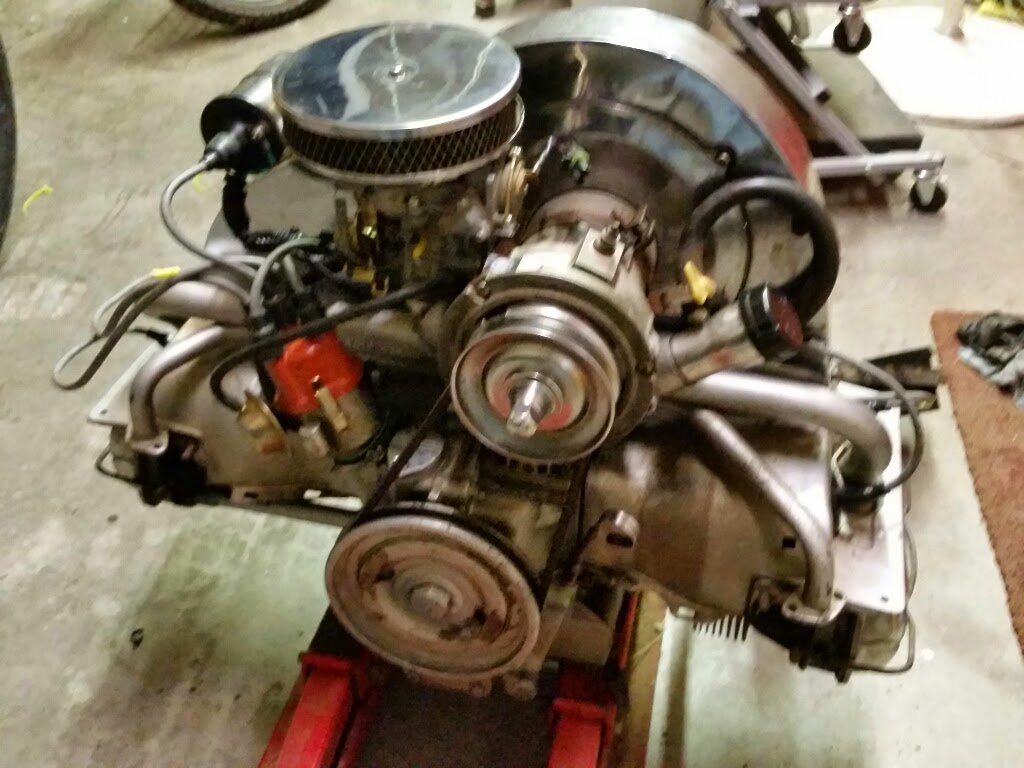
So, I moved all the bits over, alternator, intake, carburetor, distributor, oil cooler.


Started it up.

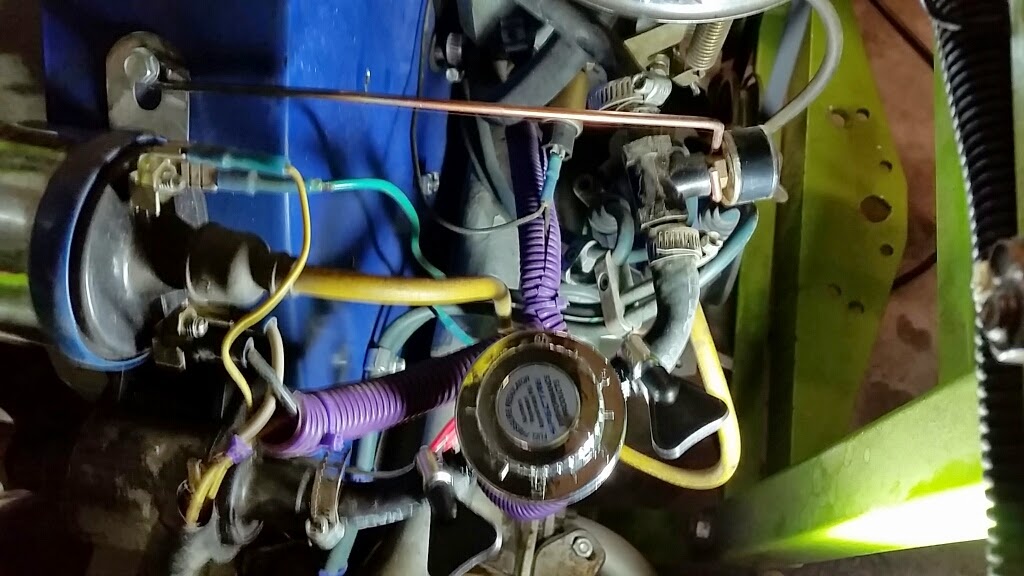
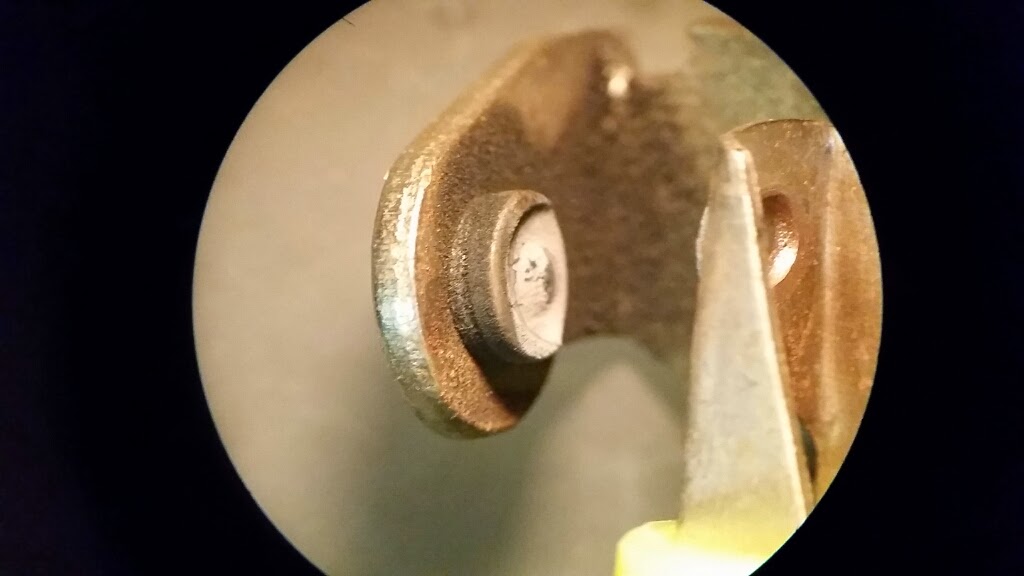
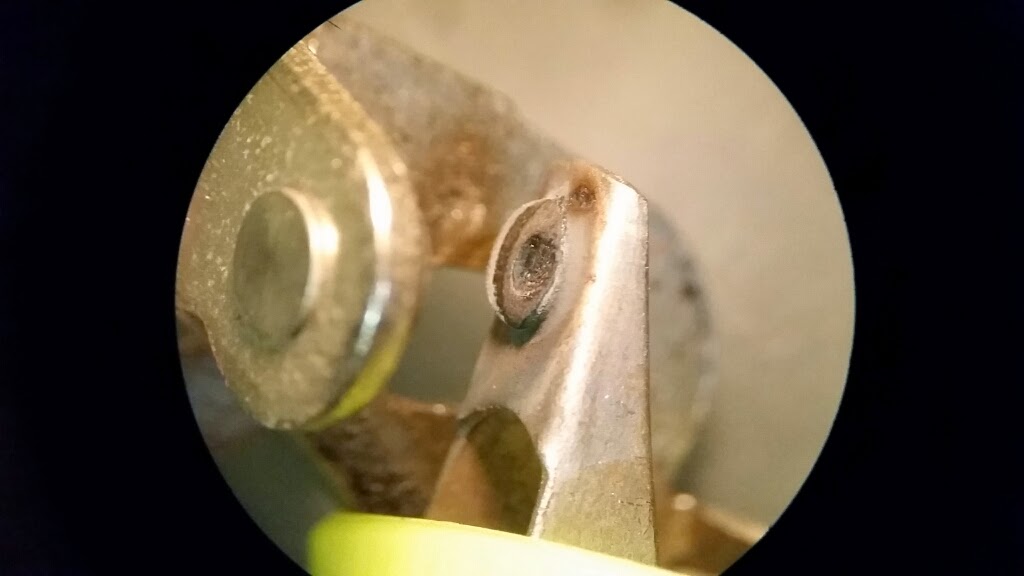
Hmmm. It runs almost exactly the same, no power from cylinder 4 and that pipe is barely warm. It runs just was well with our without a plug wire on 4. I connect a spark plug to the #4 wire and there *is* a spark, though admittedly, it looks a little weak. I dug deeper and found that the contact on the points was far beyond merely worn. They were eroded almost away, essentially missing.


I had a new set of points and changed them out. Fired right up and after a few minutes tinkering with the gap/dwell and timing, SpongeBob runs great!

Lesson learned: Severely worn points can make a single cylinder loose power. Essentially, the dwell was short and contact resistance was high, so the coil likely was not able to saturate. This provided a weak spark on all cylinders and probably a very weak spark on cylinder 4, probably due to very small dimensional differences between the lobes in the distributor. I may have been able to adjust the points such that it would have worked, but they needed replacing anyway. Tinker tells me that this is what points look like when the key is left on for an extended time without the engine running.

The oil in the cylinder still means a rebuild of the engine is advised, but I might have been able to put off swapping engines.


Wednesday, August 27, 2014

Epiphany


Urban Dictionary seems to summarize it well for me:

"a smart-sounding word for realizing you've been practically retarded for quite some time"

Maybe that's a little harsh, but it's certainly how I felt when I finally realized that I had about 40 hours into building this fuel tank and it's still far from done.

Last night, I brazed studs in the top plate for the filler neck. I had some difficulty getting one of them to completely wet. Funny what a little bit of unidentified trash can do to ya. After that was finally done, I hammered the now warped piece back into shape and prepared to do what I really really hoped was the last couple of steps before welding the top on, namely putting the pickup and return tubes in. I have decided for simplicity to pick up from the bottom rear edge of the tank and return to the top rear edge.

So, I picked up the tank and as I set it on the workbench, I noticed a flash of light inside that was not expected. Ugh. Essentially the entire length of a recently added seam had cracked open. Easy enough to address, and apparently, I hadn't done a good job of it already.

Once the tubes were in, I thought it wise to do a quick leak check. I simply poured some water in the bottom of the tank and watched the seams for leaks as I rolled the water around inside. Found a couple. Fired up the torch and reworked each of them. I let the tank cool to handling temperature and did it again.

Hmmm  How did I miss that leak. Repeat fix/cool/test.

More new leaks. More fixes. More new leaks.


So, I decided to stop the madness.

It seems that either my materials, my tools, my skills or some combination therein is not up to the task. I vote skills. I suspect that my welds are marginal and when working on one fix, metal expansion stresses out new cracks. Maybe the torch is too rich and adding carbon to the weld, making them brittle. Maybe I'm overanalyzing it :)

In any case, there is at least one manufacturer that has an off the shelf tank that would be serviceable, and they take custom requests. I have submitted a request for a quote. Since it's custom anyway, I want to make it as close to ideal as possible, so I have asked for two AN-6 fittings for pickup and return, a marine flange for the fuel level sender, an angled filler neck with vented cap and mounting tabs ready to bolt in place. I might add another mounting tab to mount the fuel pump to; depends on some fitting considerations that I will have to experiment with.

With some luck, I will have a first blush quote soon enough to determine whether the custom tank is even worth considering, which will center around whatever the cost is.

Friday, August 22, 2014

The Tank That Does Not End


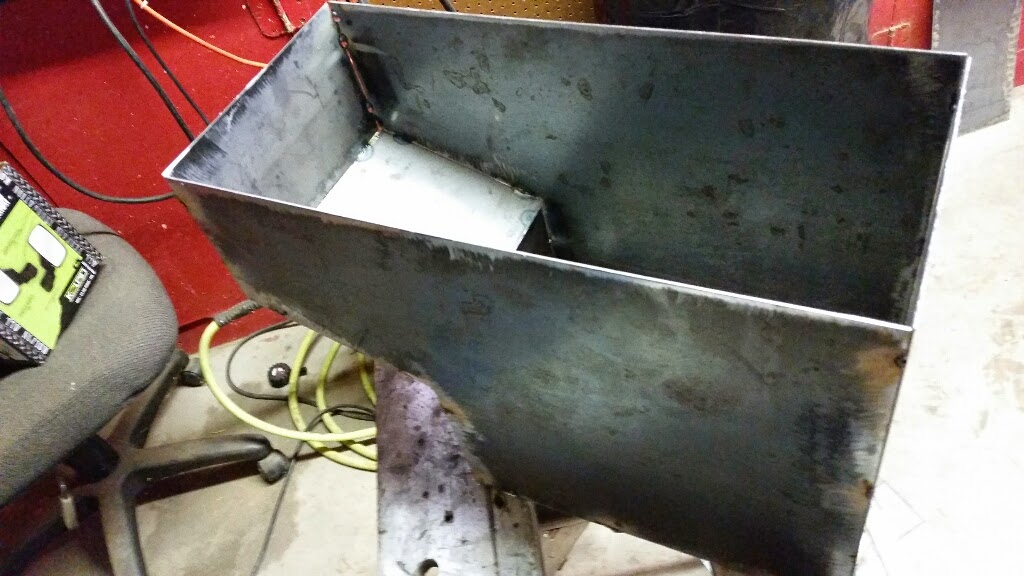
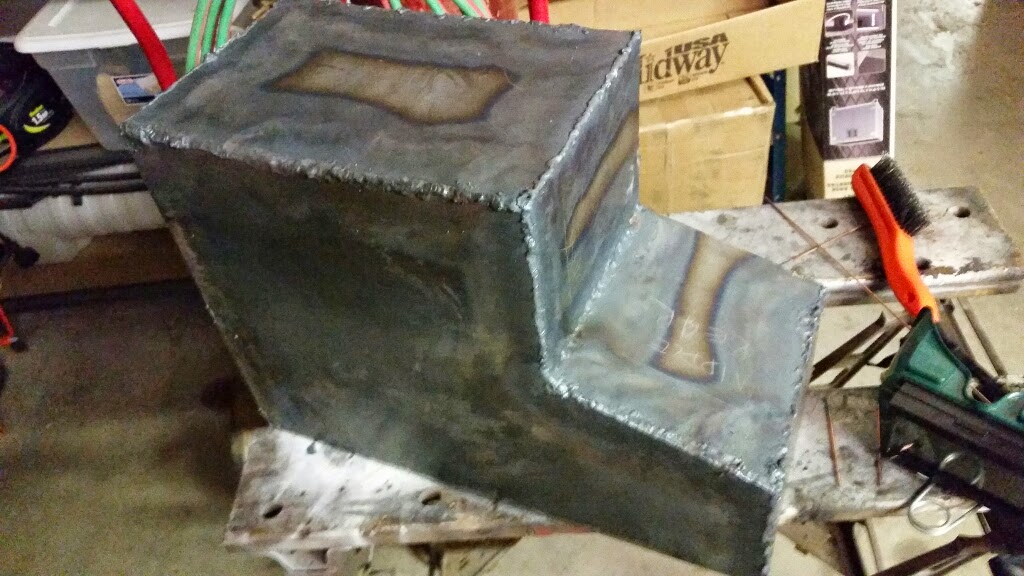
The new tank is largely finished, shown here after tacking the panels together and before welding.


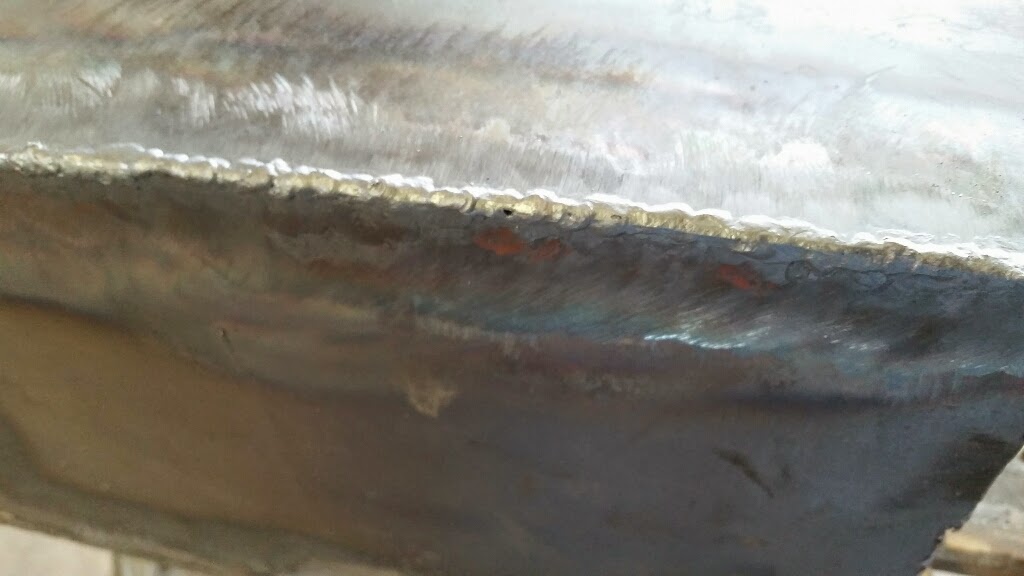
I am disappointed with how rusty I was welding. I had to re-weld almost every seam.


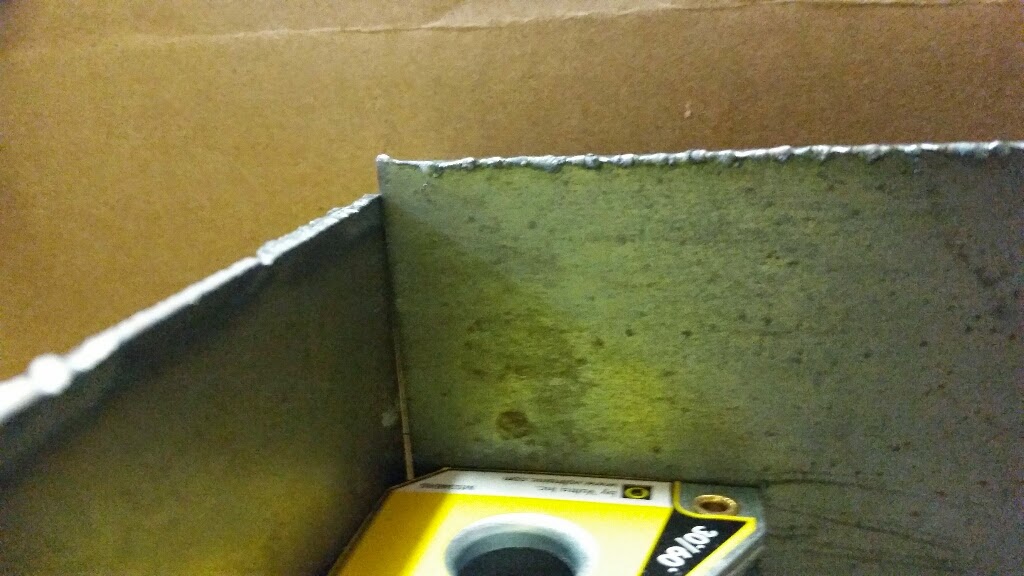
You can see how rough and blobby they are here. I spent much of Saturday grinding them clean and retouching all of them. Once I had done a few of them, I seemed to get my groove back.


Had I started with nice welds, I would not have had to grind NEARLY as much. Pay no attention to the pinhole in the middle of the pic. It's gone now.

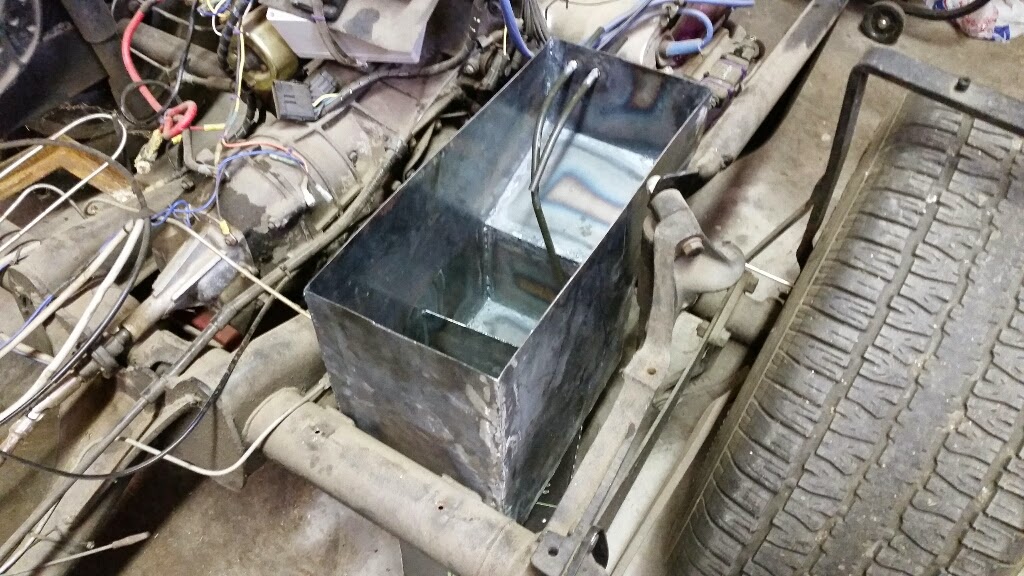
I have decided to go with an external fuel pump, so I added plumbing for pickup and return. Sharp observers may note that the pickup tube takes off at an angle. That was easier that rebending it or cutting it. Deal with it :)

Also visible in this picture is a baffle added to the tank. It is tacked to the sides of the tank with about 3/8" gap between it and the bottom.


Sadly, it is at this point that I also reach another decision, or more accurately, the legacy of an earlier decision, and it turns out to be a bit painful.

I have opted for external plumbing so that I can remove the in-tank fuel pump and lower the tank in the frame. This will in turn let me lower the body, which needed to be raised to clear the top of tank. By not thinking this option through way back when I drew up the design for the tank, I didn't account for the tank extension interfering with the axle in the lower position. It almost sits on the axle in the lower position.

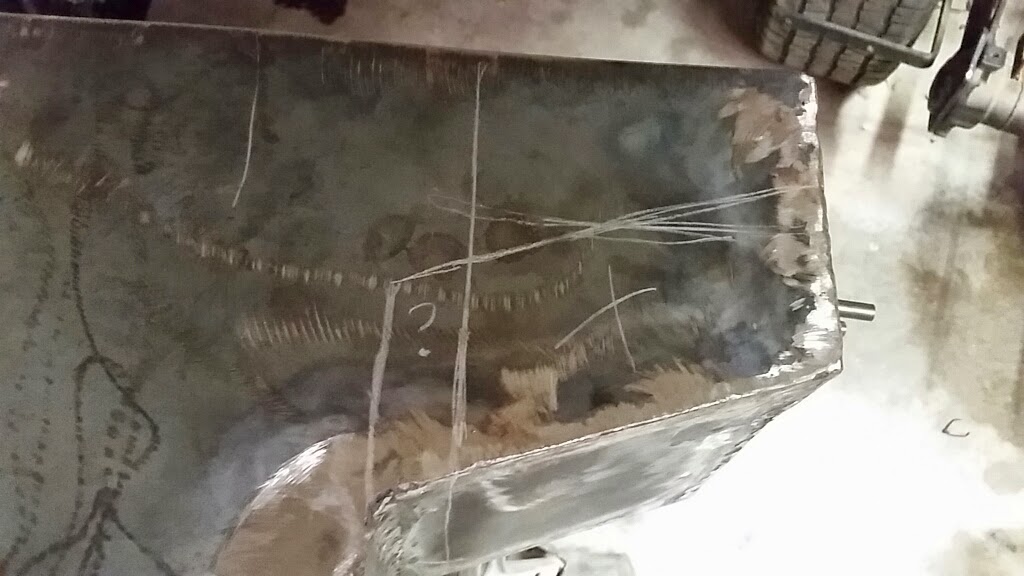
After much hand wringing, I have decided that the lower tank and subsequent lowering of the body is more important than the extended capacity of the tank. So, I will lob off most of the extension.


The single vertical line is where I will cut. This will still add at least a tiny bit of capacity and will under no foreseeable circumstances interfere with the axle. I had considered moving the bottom of this section up, which would allow only a little bit more capacity and would let me keep the plumbing as it is, but would still have a chance of interfering with the axle.

And to be clear, it's not the axle I presume would be damaged in the collision, but the fuel tank, right there over the exhaust pipe for cylinder 3 and right next to the spark plugs. Lets keep the fuel encapsulated until it's in the cylinders.

In a related design shortcoming, the fuel level sender, as layed out recently, is directly under the same body brace that I need to lower the tank in order to clear. On the plus side, with the new shorter top, I can cut from both the front and the back of the top to make it fit and in the process move the sender forward or backward away from the brace, whichever seems best.

This change will also hurt my plans to make a nice extended fuel filler neck. I will need to simply move the neck off the old tank. I have looked for a new neck. The only ones better than the one I have are weld in parts for aluminum. Maybe the next tank can be aluminum.

This delay has allowed me to come up with a checklist for what is needed to get this trike well on the road and I'd be fibbing if I didn't say it will be tough to make it by Labor Day. They are in no particular order:

1. The fuel tank completed, duh. Finish cutting, welding and lining. Includes new plumbing, cleaning of fuel lines and probably the injectors.

2. Wiring issues resolved; there were a couple of emergency repairs made because wires were so short that they pulled loose from the back of the fuse block and were pretty much unreachable for repair.

3. Wiring diagram; optional but almost a requirement to get all back working.

4. Brake master cylinder reinstalled.

5. Brake slave cylinders replaced (optional, but highly desired; need front wheel cylinders instead of rear)

6. Footpegs painted/powder coated and mounted; will involve cleanup grinding of attachment area on frame tube and possible refitting of mounting flange to tube.

7. Replacement of shifter; most likely, I can just take the shift lever from the new unit and leave the rest of the old one in place.

8. Ignition switch placement. This should go in the fiberglass, but I am afraid it will not be a simple project and may do extensive damage to the paint if not done perfectly. Considering putting it down by the shifter. May end up with temporary alternative, probably using the headlight switch on the control pod.


Thursday, August 14, 2014

More Cutting...

Last night, I rough cut the rest of the fuel tank panels.


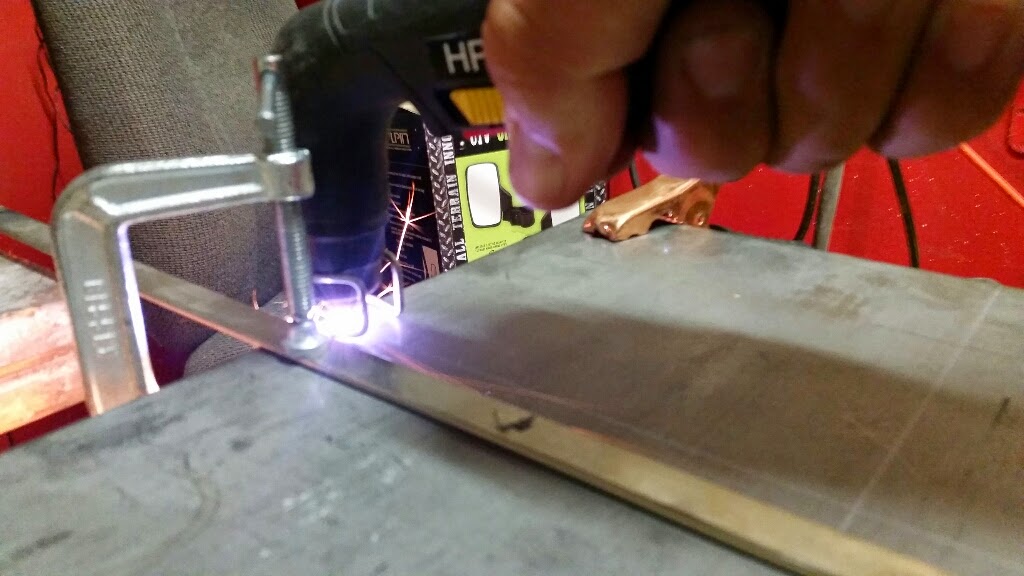
I was able to clamp on a straight edge and follow it for all cuts.

I haven't perfected the offset yet, so I do have some parts that might need a little more trimming.


A simple straight edge, clamped at an offset from the cut line, works pretty well. The wire standoff guide is far from ideal, though.

In any case, I have a stack of panels, ready to trim, clean and assemble!

Wednesday, August 13, 2014

The Long Awaited Parting


I have, after MUCH delay, began the construction of the replacement fuel tank for Puff, the dragon trike.

Stacked two 2' squares of 16ga mild steel and plasma cut them simultaneously....

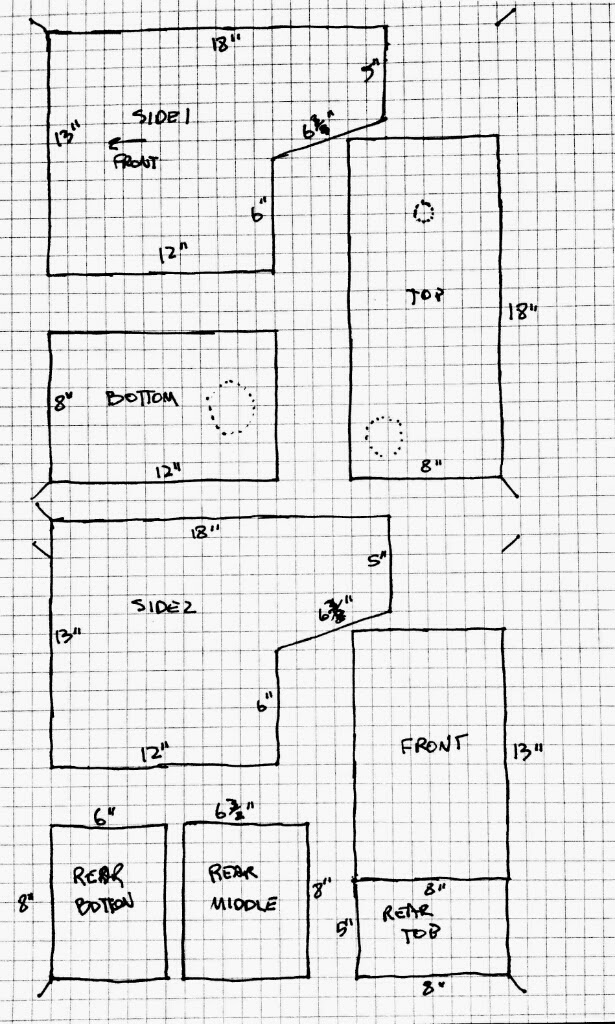
Here is the basic plan:


The layout is intended to use as many of the factory sheared edges as possible to help keep the parts as square as possible. I would love to have used one 5' long 8" wide strip for the top, bottom and ends, but I don't have a bending brake. I have found many inexpensive brakes, but they tend to be limited to 20ga and smaller material. There is a substantial jump in the cost of tools that can bend 16ga. So, instead of about 11 feet of seams to weld, it will be more like 25 feet.

The dotted circles on the top piece are for the filler neck and fuel level sender.

There is a dotted circle shown on the bottom piece is intended for the in-tank fuel pump I am currently using, but I don't like it hanging out of the bottom of a tank that is already pretty low to the ground, so I am considering plumbing this tank for an external fuel pump. On the other hand, I already *have* the in tank pump, it has a pressure regulator attached and it needs no return line plumbing.

Not shown in this drawing are a couple of baffles to be added to the bottom to minimize sloshing. These will simply be panels tacked to the sides and bottom of the tank, arranged and/or cut to allow free flow of fuel, but not totally free movement.


Monday, August 11, 2014

Long Time!

It's been a long time since I've updated here... Been busy with other stuff and even that has been slow to update lately :)

Trike stuff has been slow, but not static. Since that last update, Spongebob has had the most blogable action.

Though it was not immediately apparent, while being stored for a while, Spongebob leaked a lot of oil. Turns out that what really happened is that the fuel tank cap did not vent correctly and the pressure was able to overcome the float valve and flood the engine with fuel, which eventually seeped to the crankcase and overflowed it. This became very apparent when I was rolling the trike out to attend a monthly BTW meeting. It first acted like the battery was nearly dead, which was not unexpected. Unknown at the time, the engine was actually in hydrolock and not able to turn over. Keeping at it, I cleared the cylinders, but when it started up, oil poured everywhere.


Though it would be a few days before I got to it, I drained the crankcase and refilled with fresh oil and started it up. It still leaked oil at too high of a rate to operate, so I presumed the event had damaged the front seal and I again left it for a while.

When our vagabond friend John came to visit, he got interested in effecting the repair, as taking Spongebob for the occasional spin is one of his favorite activities, so I let him tear into it. He replaced the front seal and did a lot of cleanup on the engine, as well as a number of other related work. Even after that, if the cap was properly closed, it would do the same thing. For the time being, we were leaving the cap loose unless the trike was underway somewhere. We also installed an inline fuel shutoff valve. That that seemed to have prevent it from happening at all, though it's not really in a convenient spot to operate all the time.

I opened the cap and reduced the spring tension on the vent mechanism by trimming out a couple of coils. My redneck test of sticking it on my mouth and blowing indicated that I had reduced the required pressure by about half, but in use, it still fails to vent before it blows past the float valve.

I then fashioned a tank vent by putting a fitting in the filler neck and attaching a length of hose to it. There is no pressure build up, so no overcoming the float valve!


In proper followup, I probably need to replace the float valve. Chances are that it may have been damaged by the overpressure situation.

Then comes the day this weekend when we are again wanting to take the trikes to a BTW meeting. I had tried to start the trike the previous weekend when were were attending a birthday party. It would crank and crank, but not start. We were short on time that day, so I didn't do any other troubleshooting. This time, however, I had a little more time and put some more time into it.

I found a badly cracked rubber vacuum cap on one of the carburetor vents. In my experience, that wont usually prevent it from starting, though it can make it run very badly. It took a while to find the package of caps I had, but of course that didn't make any difference. It seemed to be getting spark, but I didn't smell fuel. I started tracing that down and found, surprise, the inline valve was off. Opened it, turned the key on and heard the tone of fuel pump change as it pressurized the system. Hit the start button and he lept immediately to life.

I pulled both trikes over to the house and hosed off the dust; not really a good wash, but roadworthy. We headed in to Fort Worth for the meeting.

As we got close to our destination, the other trike began running rougher and rougher and eventually stopped... in the left turn lane on the access road where we needed to cross over and u-turn to get to the meeting. Try as we may, it would not start. We waited for a clearing in the traffic and I pushed Gabby into a sharp right turn. The road had a bit of a hill on it and she tried bump starting it on the hill and, surprisingly, it started! We were going to try to see if we could make it to the meeting before it died again, but it didn't get far at all. After another try or two at bump starting it again, we gave up and parked it. Gabby climbed aboard and we headed to the meeting, arriving late, but arriving.

After the meeting, a crew of folks went with us to troubleshoot and it was determined that the alternator belt was loose, very loose. Loose enough to prevent it from charging, which apparently let the battery run dead enough to not provide a reliable spark, which seems to be what stranded us. Also why a bump start worked for a bit, with started not pulling the voltage down.

After establishing that there were no shims left to remove in order to tighten the belt, one of the crew produced a spare belt from his parts stock and we installed it. Well, I say we, but nobody made room for me to help, but I let them do it for me. :)

By then, the battery had chemically recovered sufficiently enough to start and the now tight enough belt was actually charging. Long story short, the trike was reliable for the rest of the day and even had noticeably brighter lights. Amazing what you miss if you don't look for it.


Friday, May 31, 2013

The Awl Bid'ness

We had the Memorial Day BTW shindig to prepare for, so I changed the oil in both of the currently serviceable trikes and added (re-added) the the long since bypassed oil cooler on Sponge Bob. The new oil cooler is an Empi 9291 shrink wrapped kit that includes an adapter to connect to the block and a remote oil filter adapter. There is an engine adapter already in place from the previous cooler and time and hose constraints have delayed the installation of oil filter at this time.

This cooler is a 8 pass unit, larger than the old one. Consequently, I needed to find another place to put it. There was room under the deck on the right side of the engine.


The bracket is bolted on one side to the box. I made a simple bracket for the other end.
Then I pretty much split the hose that came with the kit and plumbed it into the engine.
It didn't seem to take a lot of extra oil, but I'm guessing it's probably about 1/2 quart for the hose and cooler.

Next, I need to add some disconnect fittings into the lines so that removing the engine will not require either pulling the hoses or unbolting the cooler. Pegasus Auto Racing has some nice AN fittings for a reasonable price. I got four female hose ends and two male couplers. Not only can the cooler be removed, this configuration makes it fairly easy to bypass the oil cooler if the need arises again.

In less happy news, the oil leak from the rearish of the engine was not stopped by the replumbing, however having freshened the oil, it's now a bit more obvious that it may be transaxle oil rather than engine oil. The oil on the ground is black, but the oil on the dipstick is honey colored, even after 400 mile round trip. While this occurred to me earlier this week, I have not yet verified the theory. It should be pretty simple to check; transaxle oil smells horrible.


Tuesday, May 14, 2013

Uddn Uddn

The engine in Kermit is beginning to show the signs of needing a rebuild, so (long story short; savor that while you can) we found a likely candidate on Craigslist. I got up (relatively) early on Saturday and drove the hour and a half to Lucas, TX, where I found Bob to be a very friendly and interesting guy. We could have gabbed for another hour or so, but I wanted to get back home and see if I could get this thing done in time to ride to the BTW chapter meeting on Sunday.

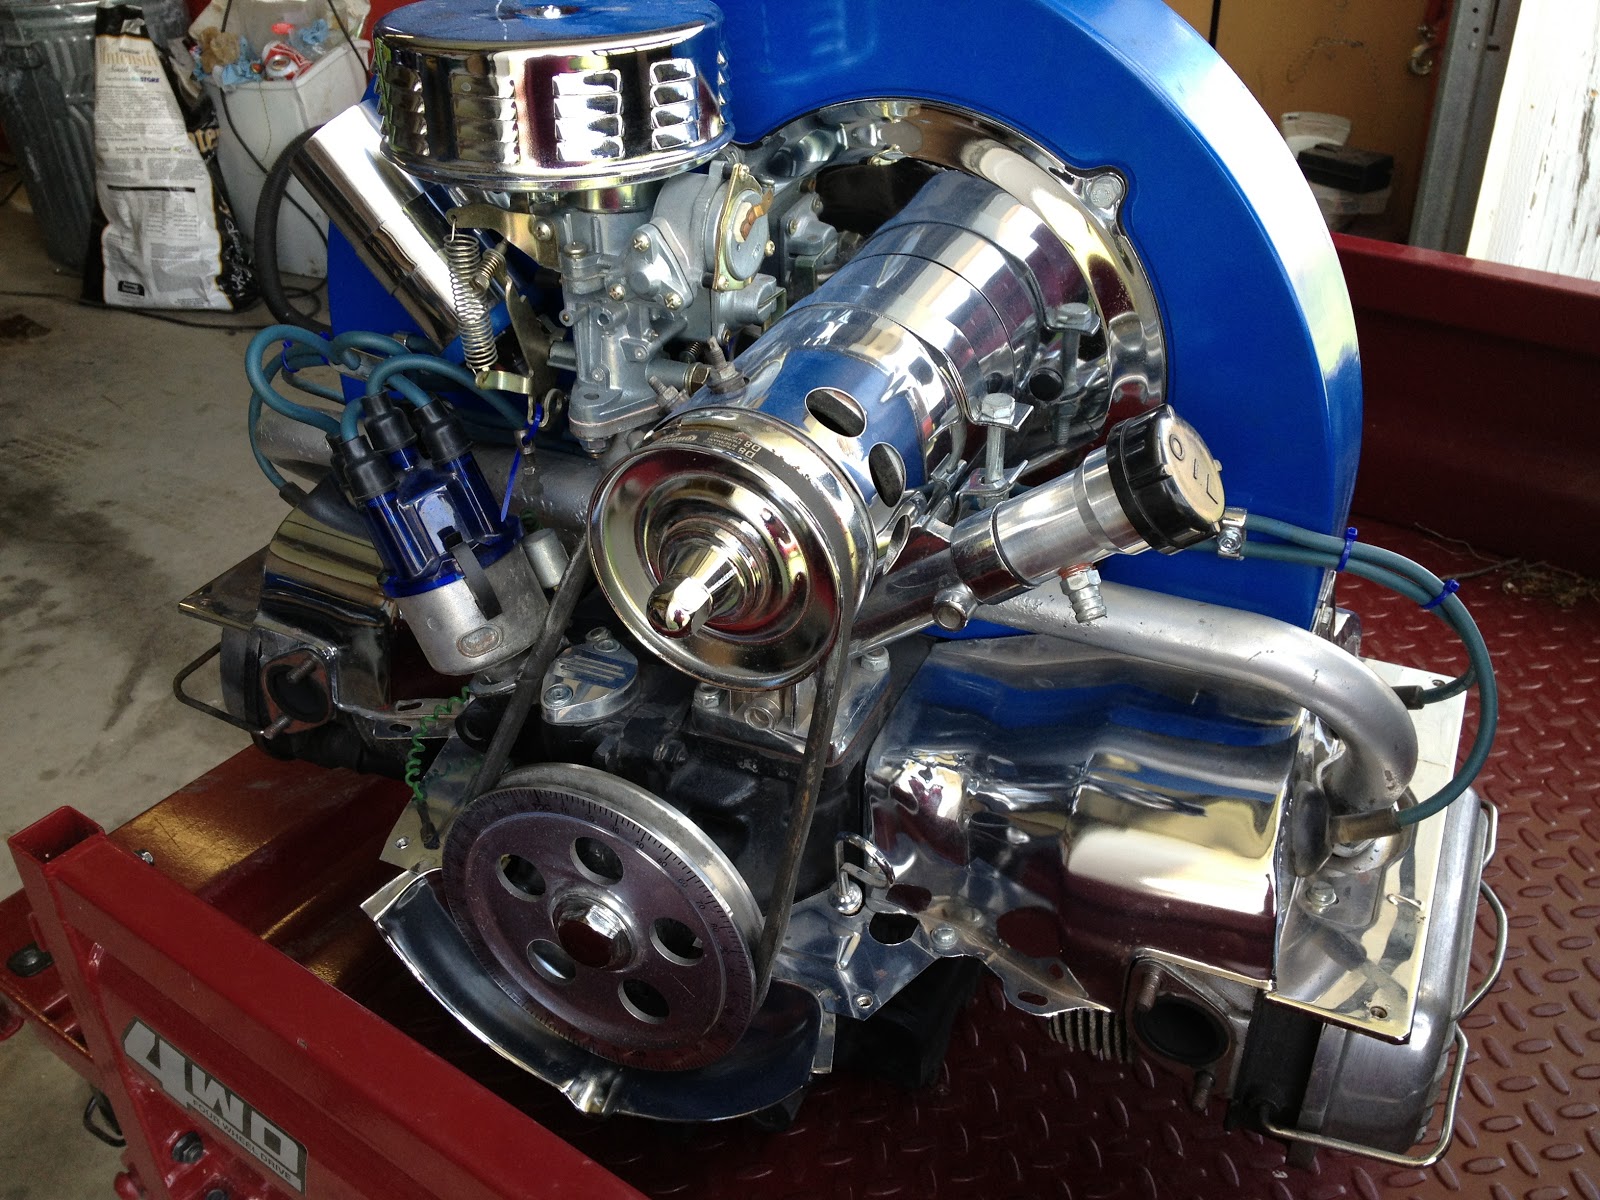
I got started about 1PM. This is Kermit's old engine before the operation began.


Removal of the old engine was a breeze, especially having done it a few times by now. On the other hand, the new engine had a generator and since Kermit isn't wired for a generator, I elected to swap them out. I remember now how involved it actually is to do that. It involved so major a disassembling that I should have changed the carburetor while I was at it.


The carb on the new engine is literally brand new. It, like the oil filler neck, had obviously never had any fluid through them. I was mildly concerned because the carburetor is a 30PICT-1, originally intended for 1300cc engines. I was going to suffer greatly if this turned out to be a 1300, but I was confident that the AE- serial number on the case, the doghouse oil cooler and the 200mm flywheel all pointed to it more likely being a 1600.

The new engine had a threaded insert where the old one had an open hole, and the bolt I had was a D-bolt intended for a starter and wasn't really one for torquing down. It would probably have sufficed, but this is Mama's trike and I don't want it to come loose just because I was too lazy to go buy the right bolt. Of course, where we live, that's a 45 minute round trip, especially if the first place doesn't have it and Blue Bell is on sale.

The clutch was moved over with a minimum of fuss, but I did not have the handy dandy alignment tool, so I eyeballed it. That turns out to have cost me more time that it would have taken to drive into Fort Worth and get my clutch tool from the old house. Unfortunately, it didn't occur to me that it could be that until I had exhausted every other explanation as to why I just couldn't get it to go that last inch. It was in far enough for the splines to engage, but apparently that wasn't enough. I pulled the engine back out (not that it was actually attached), carefully loosened the clutch bolts until I could just scoot the disc and used my socket handle as the closest tool to the proper one. Tightened everything back down and stabbed the engine first try.


The Mr Gasket fuel pump was very easy to put back where it came from on the old engine, but the coil used to be mounted on the back where the doghouse oil cooler is now. I didn't like the stock location, though I can't really define why. So, I put it on the edge of the fan housing, just above the fuel pump. this is kinda ugly from a wiring standpoint, but it's the best compromise without redoing all the wire in the area and the goal here is to have it ready to ride on Sunday.


I had no further trauma and was able to crank the engine and start it, first try, around 11PM.


Now, it didn't run very nicely, which turned out to be because plug wires 2 & 3 were swapped on  the distributor cap, but once that was corrected, I was able to get a decent idle and rev out of it. I don't fit this trike; it is carefully adjusted to fit Gabby (and I guess anyone near her perfect dimensions, which rules me out for I am a couple feet too tall), so a test ride would have to wait for her in the morning. I called it a night around 1AM. 12 hour job.

Sunday morning, Gabby took it for a ride, and armed with the knowledge that the carburetor was probably too small and the centrifugal advance distributor was probably not going to act like the old engine, she a little reluctantly agreed to try taking it to town for the meeting. I finished putting the rest of it together, bumper, air filter, etc and we got ready for the meeting.

It generally ran ok, but developed a tendancy to die at stoplights. Trooper that she is, she tolerated it for nearly 200 miles of round trip riding. We went to the east side of Ft Worth for the BTW meeting, then to Bridgeport to find that our Mother's Day dinner destination closed at 3PM. We went to Sweetie Pie's Ribeyes in Decatur and had steaks and that horrible apple pie that is so bad that they only serve it a few times each year. We took a walk around the square, enjoying the sights. We went from there to Tractor Supply, cause ya just have to, and on home. It was a long day.

The performance of the new engine was, generally, good, maybe a little lackluster, but not without expecting it to be. So, when I got home tonight, I swapped out the 34PICT-3 carburetor and vacuum advance distributor from Kermit's old engine. I had some difficulty getting it to idle really smoothly without setting the idle advance to about 20 BTDC. Full advance wanted to go too far, so I had to back it off a little to about 15 degrees to keep maximum advance below 35 degrees. I didn't touch the carburetor adjustments. Now, it has a little bit of a lopey idle, but revs way quicker than the old engine. Bigger cam? Dunno. We'll see what Gabby's new test drive allows. Hopefully, she can do that during the day tomorrow and if she's happy with it, she might ride it in to work.


Monday, April 22, 2013

Stuff begins with stuff....

I picked up a stack of 24" squares of 16ga mild steel today. Because of the way they cut and order stuff, 24" squares must be ordered in lots of 8. I know that the tank for Puff will take two squares and all the other stuff I envision will take more and more, so I thought 16 would be a good order that will last a while.

Bit O' Metal Trivia...  16 sheets of 2'x2' 16ga weighs 160 pounds, pretty much...


A New Seat for Kermit

Before I get on with the seat, I have some other update duties to perform.

Kermit had started stalling at most stops, especially in such conditions as a freeway exit or getting caught by a light in a long straightaway. He would always start right  back up and and appear to return to normal without issue.

I suspected either of two things, idle circuit adjustment or the throttle cable arrangement, and really, I figured it would be a combination of the two.

Well, spent a good half day dinking with them both to no avail. I found that even sitting in the shop, I was able to duplicate the issue... If I held the engine at 3000 rpm or so, it would die when I closed the throttle. I also noticed that it had a little bit of a miss during that rev.

Then I finally figured it out, having until then ignored the very thing I had installed specifically to catch this kind of problem! The inline fuel pressure gauge was showing 1 PSI. I shut the engine off and was able to squeeze the hose and get the indicator to swing full scale, so it wasn't a bad gauge. Started again and watched the gauge. When running at 3000 rpm, pressure dropped even lower, then about the time the engine would die, the pressure would come back up to 1 PSI. The entire circuit from tank to carburetor is less than three feet as the hose flies.

Long story short (too late), it was the fuel pump. Makes sense... could provide good enough volume to run, though a little lean at higher rpm, then when you come off the throttle, it dies because the idle circuit picks up from the top of fuel bowl. By the time you can restart it, the pump has caught up and filled the bowl. Rinse. Repeat.

So, dashed down to O'Reilly in Decatur (about a 30 minute round trip) and got another fuel pump and a new filter. All hooked up, 5 PSI, can't kill it now.

That day, we went on a ride just short of 150 miles and it didn't (unexpectedly) die once.

So, fast forward a week and I have a new (new to me, anyhow) Hobart AirForce 250ci plasma cutter to play with. Wanted a plasma cutter forever and finally had both the wherewithall to drop a few bucks on one *and* a decent price for a used one on Craigslist. Actually, it's so barely used, it may as well be new.

It can cut.


I chipped the dross off, but this is how it does it.

One of my upcoming projects, and honestly one of the reasons I wanted the plasma torch now, is a replacement fuel tank for the purple trike. That will be made of 16ga mild steel.

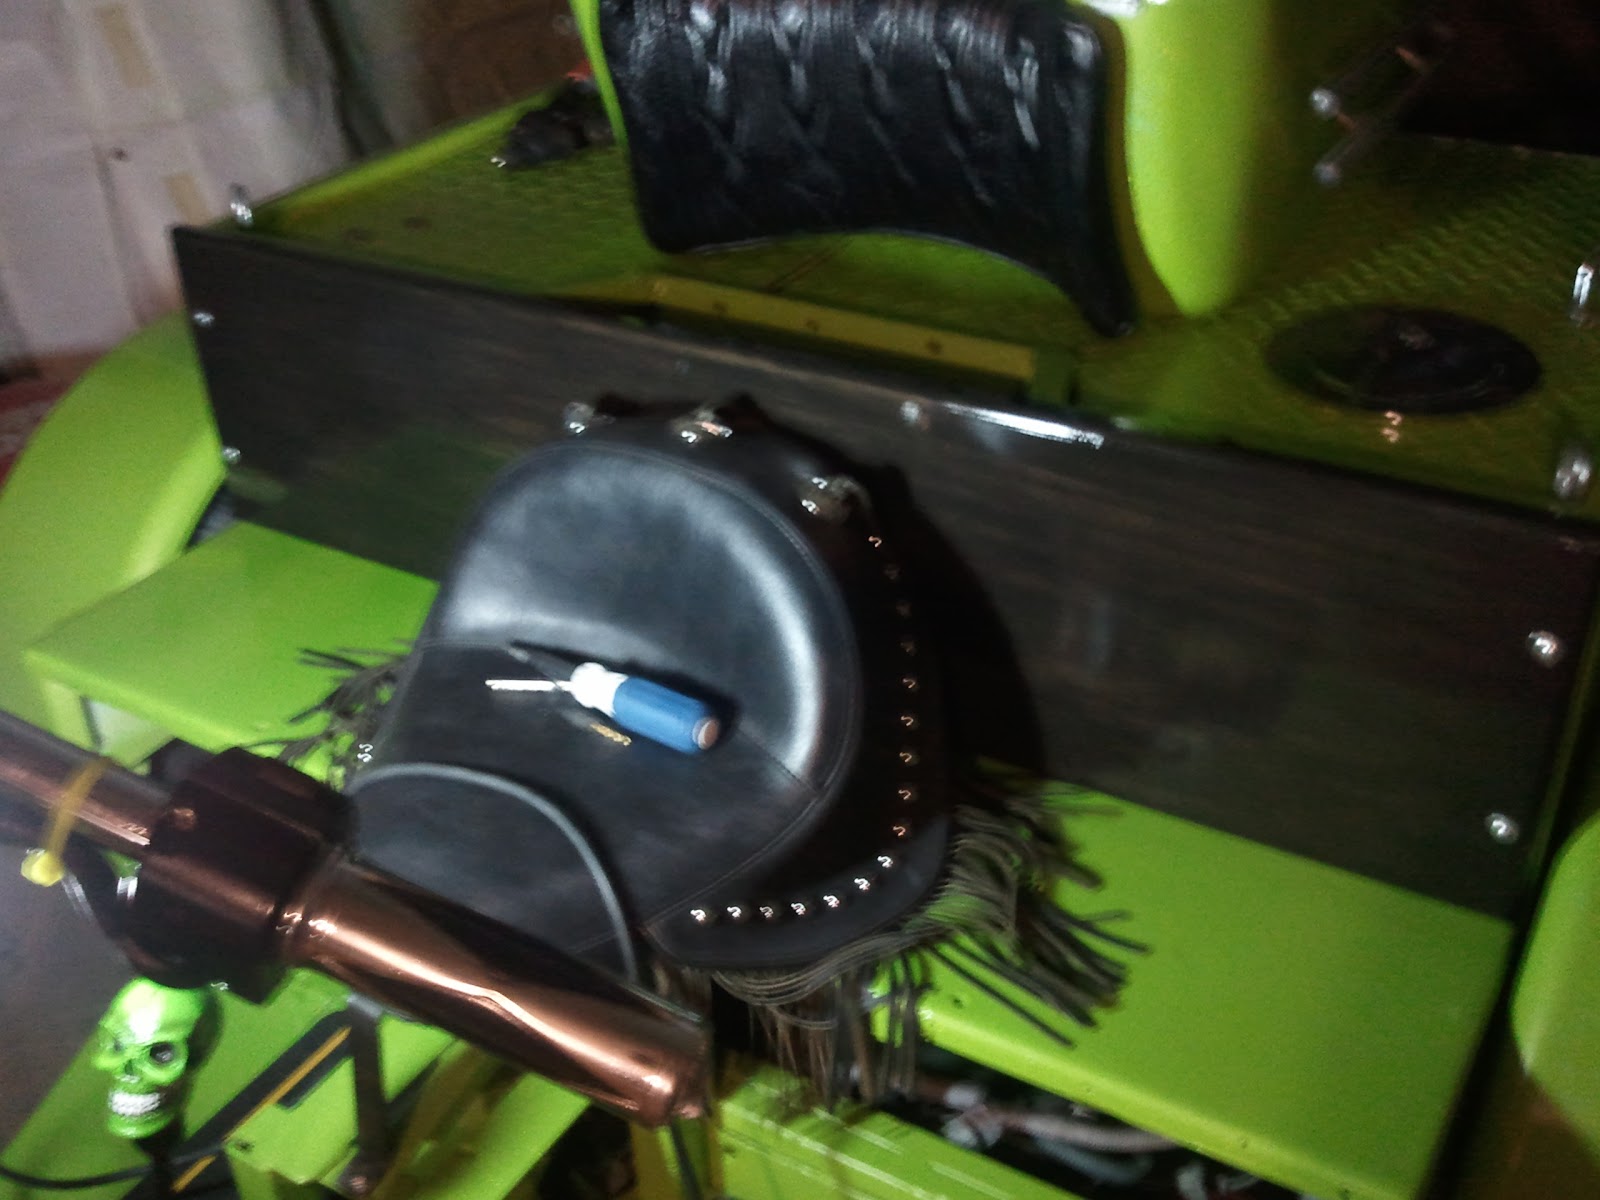
In any case, today's project was replacing the seat on Kermit. The old seat came from the basement at American Motorcycle Trading Company in Arlington. It appears to have been a take-off from a modern Indian motorcycle. Decent enough seat, though a trike puts more weight on your tailbone than a motorcycle typically does, so said tailbone can really tell when you've been on a long ride.


After looking at a *LOT* of seats online, mostly boat and tractor seats, we decided to try a particular tractor seat from Northern Tool, which also happened to be on sale for $70.

I knew that it would involve building a bracket of some sort to mount pretty much any seat, so after some test fitting and test sitting (by Gabby; I don't fit on Kermit), I had an idea that 2" square tubing would work pretty well.

There was no easily accesible square tubing to be had on Saturday, but I did get some 2" 90 degree angle from Lowes. Using my schmancy new plasma torch, I learned how not to cut a straight line, then refined the technique until I *could* cut a straight line and zeroed in on a plan to give 2" square tubing in the place I wanted it most, at the ends, by welding a short piece of angle to the span thusly:


The overal bracket is basically U-shaped, with the square "tube" ends holding the back of the seat suspended on a body crossmember and the front sitting on an existing pedestal that I would otherwise just as soon cut out.


I also got to cut out a reduntant piece of metal right where the left rear seat bracket needed to go. I used my welding apron as a blanket to protect wiring and fuel lines from the easily 3-4 second cutting action. This thing rocks. Anyway...

Painted up and bolted in, ready for a seat


I managed to *not* get a pic of the finished seat, but here it is in plywood test garb.


After the seat was tested by Mike Easter, I had Gabby check it out, short of a ride since the trike wasn't back together yet. She had some errands to run, so while she was out, I also wired up to long installed and never connected oil pressure gauge and tachometer. The oil pressure gauge involved replacing the oil pressure switch with an analog sender and a bit of wiring. The oil pressure switch had a wire going up front to the wiring center, but it was not connected. I needed only extend it a foot or so the back of the gauge and wire up a ground for the sender.

The tachometer took a little more because I had to run a wire for it, pushing and threading the wire through the existing loom. Once connected to the breaker point side of the ignition coil, I started the engine up. The oil pressure gauge worked perfectly, but the tach showed double the expected RPM. There is a switch on the back of the tach, a three position switch to choose whether the connected engine is 4, 6 or 8 cylinders, in that order. I think it's probably just labeled wrong because I had to put it in the 8 cylinder position to read sanely on this four.

With those now working, I loosened the bands on the fuel tank and turned it slightly to clear interference it developed with the filler cap and decorative lid.


The trim boards on either side of the seat needed cutting to fit around the new seat bracket, but otherwise, it went back together like a charm.

We took about a forty mile meandering ride through the countryside and so far the seat seems to be helping a lot!

Monday, September 17, 2012

EFI for Sponge Bob Square Trike

I have picked up the first part for the eventual Mega-Squirting of Sponge Bob, a throttle body. It's from a Kawasaki KFX450 ATV. This TB has a 42mm throat, similar to the common *carburetor* throat size for a 1600 engine, so hopefully it will be a good match.

More to come...

Friday, June 8, 2012

Sponge Bob Gets His Stop Back

You may recall when I got Sponge Bob back on the road that the brakes were weak. I did a little hydraulics math and figured out that front brake cylinders might solve the problem.

They do!

Sponge Bob's speedo had stopped working during the time the transaxle was down. During the week, I opened the connector and checked the pins. The seemed a little loose on the sensor coil. Not sure how they would have been stretched, but squeezing the sockets closed a little seems to have restored speedometer function, so now both trikes have speedometers!

Kermit Gets A Speedo

Not the Spandex kind...

I noticed recently that a couple of manufacturers are offerning GPS speedometer sensors for electronic speedometers. Kermit has been without a speedometer since we acquired him. The 2-1/2" Drag Specialties mechanical speedometer appears to work, but the cable was broken. The cable was broken because the cable was too short for where it was mounted and did not allow a generous enough radius to it's bends. I attempted to reuse it with a longer cable, but apparently the nature of the cable's failure has it stuck in the back of the instrument.

I stumbled across a nice LED speedometer by Intellitronix that comes in, appropriately, green. More importantly, Intellitronix also make a GPS speedometer sensor. I had trouble finding it for sale anywhere, but I found that JEGS carries a couple of GPS sensors. Turns out one of them, the least expensive one no less, is the Intellitronix unit!

So, to simplify my ordering, I found a decent VDO speedometer and an Autometer chrome mounting cup, all from JEGS.

The dogs heralded the arrival of the FedEx guy and I got started as soon as I could.


Of course, the first thing is to ensure that the lighting is green. The speedo comes with red and green silicone caps for the backlight bulbs. I will probably one day replace the bulbs with LED versions, but for now, this is green enough.


The mounting location is intended to be temporary. At some point, I will fabricate a bracket to more properly center it between the handlebar tubes, but for now, I'll put it on the left one.

The mounting bracket can accept a hose clamp and/or a pair of screws. I had no appropriately sized hose clamps, so I fudged it with a few wire ties and a single stabilizing screw.


You may note that the screwhead is chewed up a bit. Turns out that the handlebar "tube" is actually a handlebar rod. Threading the screw into it without the benefit of my tap set was a challenge.

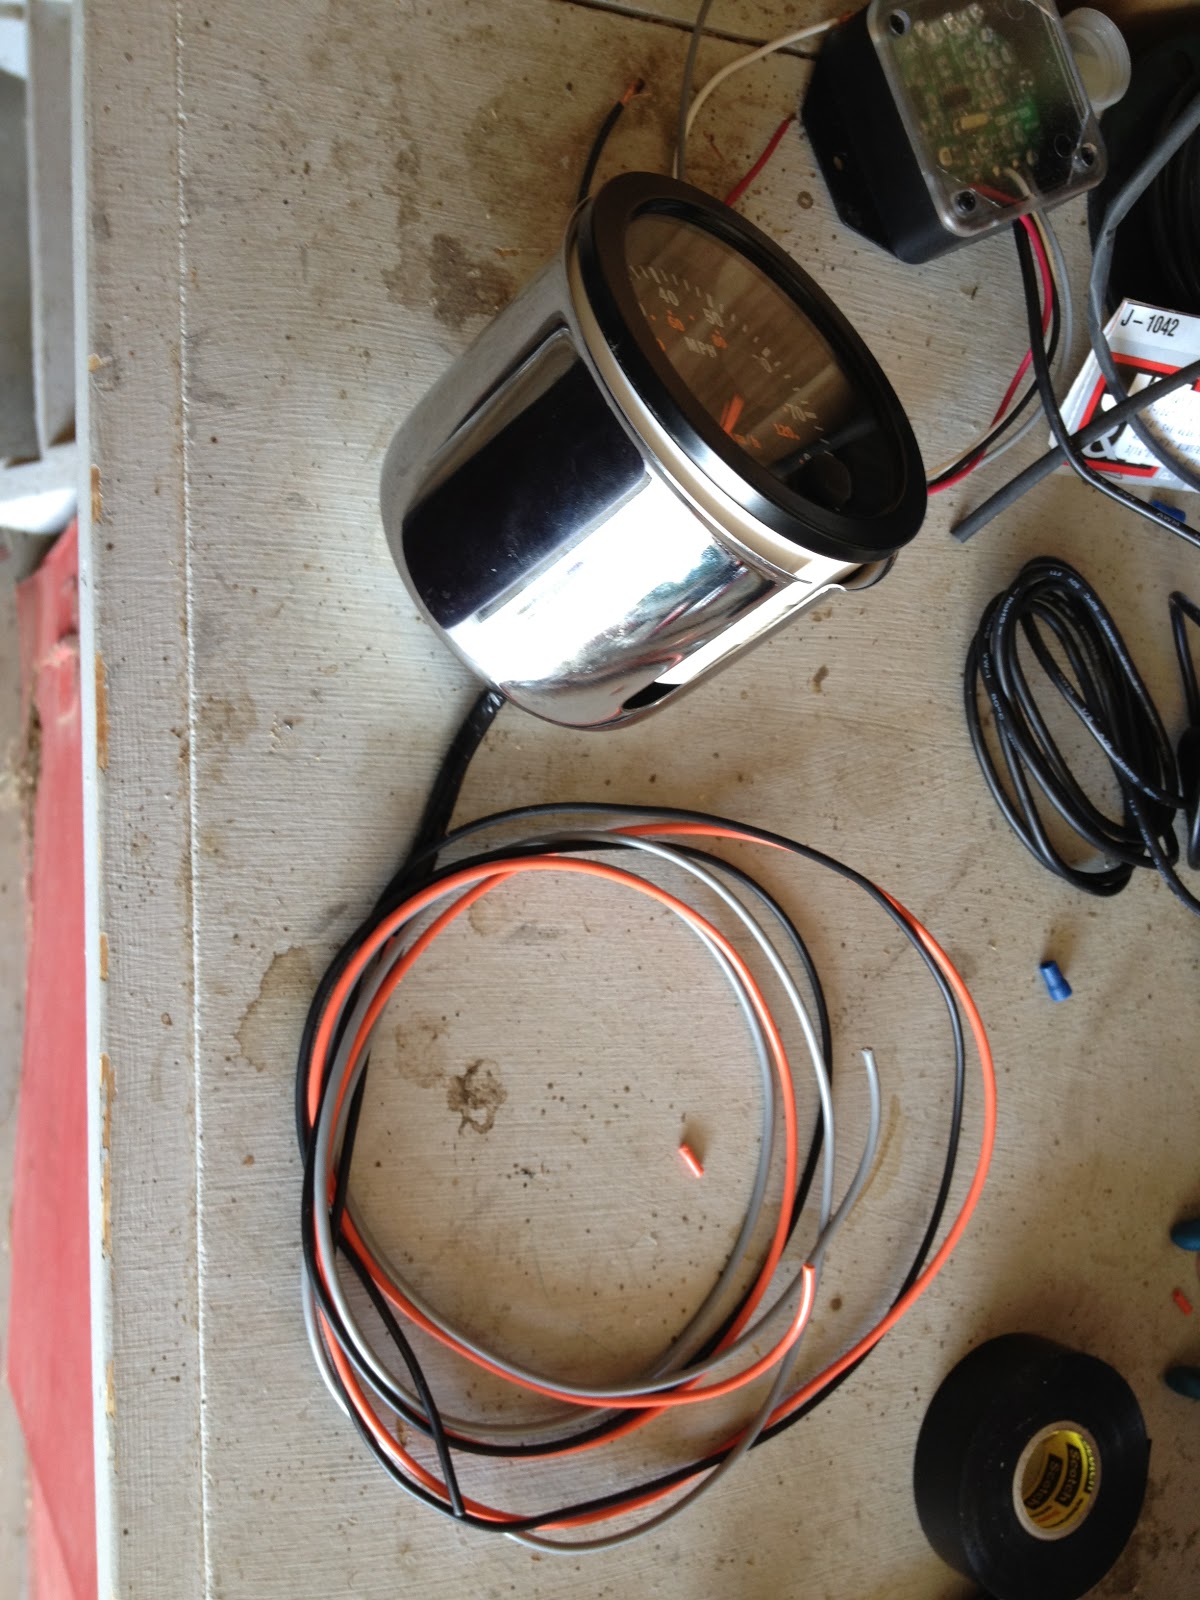
Wiring the instrument is very simple, especially when running the lights and speedo on the same power. Three wires, power, ground, speedo in. I followed my usual color codes, orange for switched power, black for ground and gray for sensor.


It looks pretty good in place...


The GPS device is not weather tite, so I installed it in the trunk.


The unit has three LEDs, red for power, yellow for antenna data connection and green for GPS lock.

Ignition on:


The first time, it took about 3 minutes for the GPS lock to come on. Now it takes about 5 seconds.


The default setting for the GPS unit is to provide 8000 pulses per mile. It's pretty simple to set the VDO speedometer to match.

I have verified that it at least indicates a reasonable speed driving across the yard. We'll road test it tomorrow and compare the readings to a Garmin.

While I was running wire in the trunk anyway, I connected the tail/turn/brake lights in the trunk, too.

Kermit Gets A Gift Box

Box from Jeggs arrived today with a basic VDO speedometer, chrome mounting cup and (ta da!) GPS speed sensor!

This sensor receives GPS signals and converts them to the corresponding pulse rate for any programmable electronic speedometer.

More shortly as I install it....


Tuesday, May 29, 2012

On the road again!

Picked up the transaxle and immediately got busy with other parts of life. Where have you heard that one before?

With vacation planned for the two weeks including and following Memorial Day, I had that Friday off work and  headed into Fort Worth to try to get it done.
Besides being a couple hours late starting, I also had trouble finding a bolt I was going to need. Once there, I decided to do the frame repair first. It took a while to get the metal cut to the right angles and length. I then picked up my torch and while setting the gauges, the red hose suddenly breached and spewed acetylene from the base of the torch. A quick trip to the second hardware store got new 25' hoses. The old ones were 15', so that's good, too.
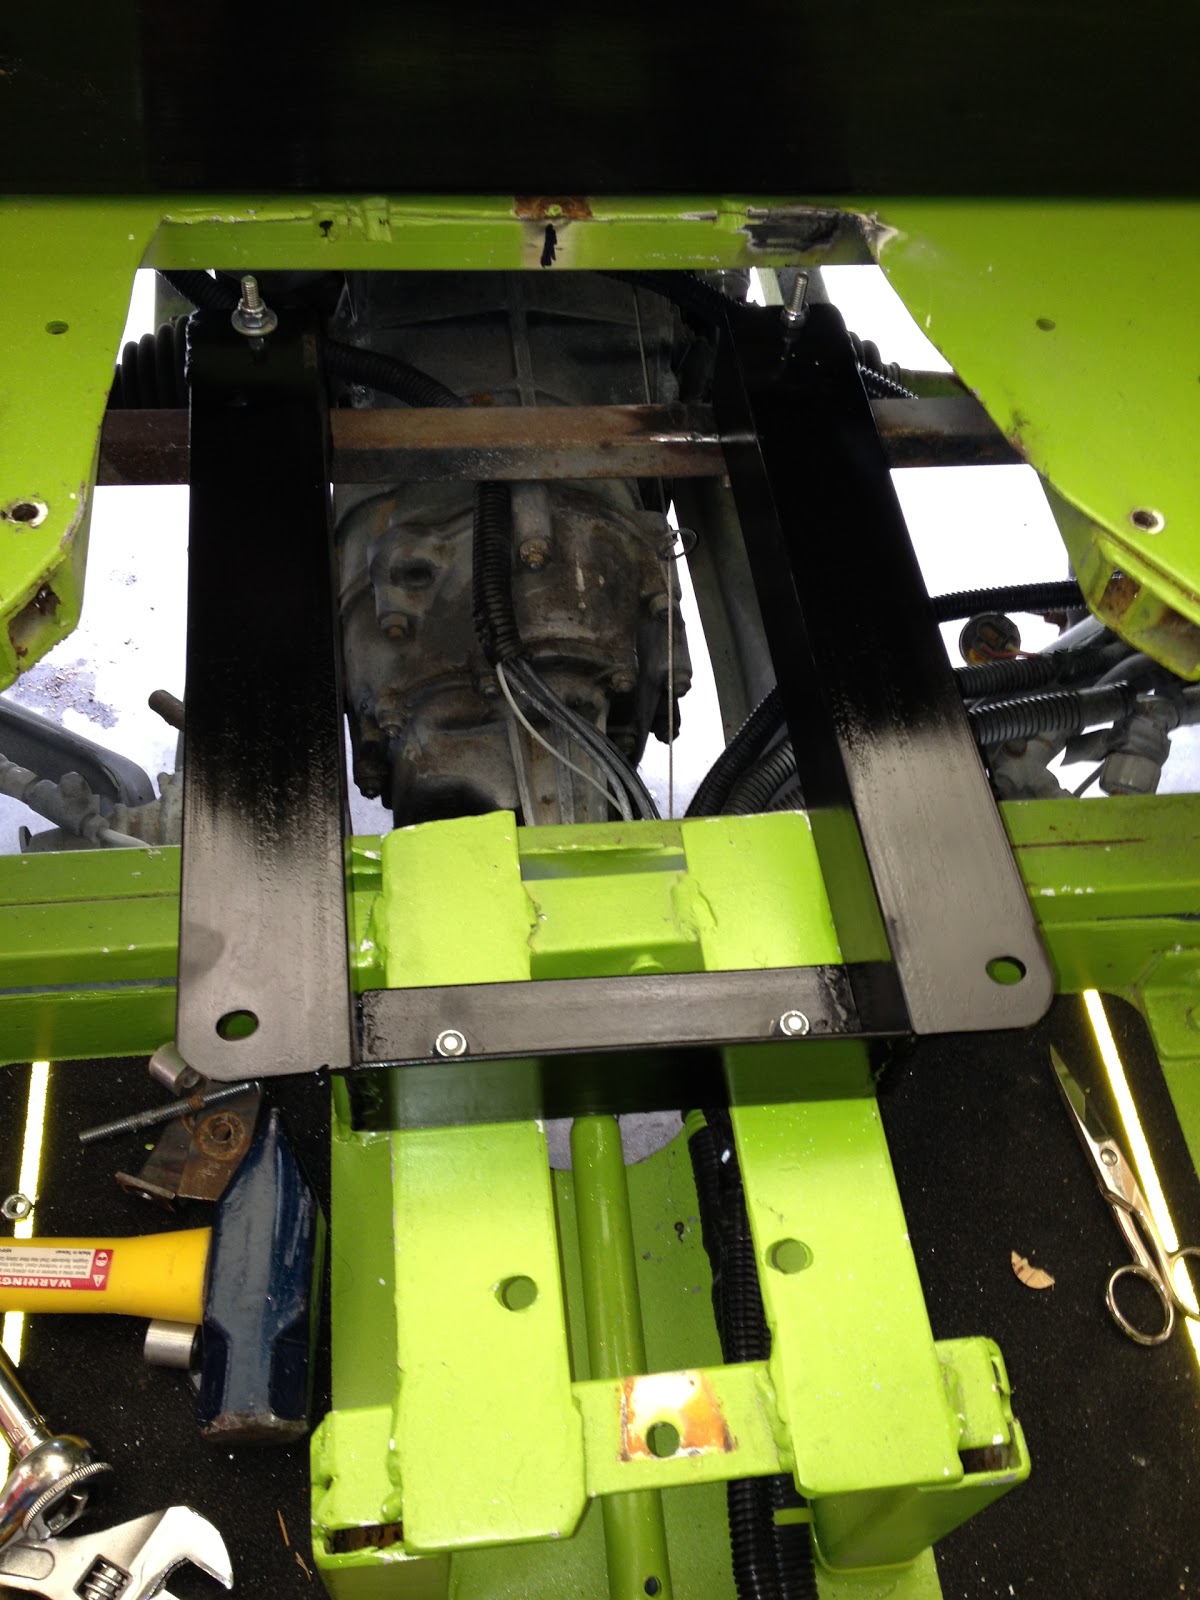
I got the braces welded into place between the transaxle forks and the bit of the body that hangs over it and commenced installing the transaxle. It went fairly well. I got it completely bolted in, shocks on and I mounted the wheels so I could use them and wheel chocks to hold the axles steady while torquing the axle nuts. Basically used my 18" long 1/2" drive ratchet and put most of my, um, substantial, weight on the handle, then tightened them enough more to put in the cotter pins.
I got the engine on the jack and lined it up. Since the VW rear end is angled slightly downhill, the rear of the engine needs to be a little higher than the front for the bolts and studs to line up, then you need to lower it slightly as you push it forward.
Then the trouble began.
One of the top bolts holding the engine and transaxle together is shared with the starter. I put the other bolt in, then discovered that my freshly welded in brace blocked the starter. Argh! It was nearly midnight and I knew that either me or the trike was going to suffer an injury if I started over that late, so I went on home. We enjoyed the rest of the weekend without trikes.
I got up Monday morning, Memorial Day, just as if I were going to work and went into town to work on the trike. So I could get the trike on the road, I had decided that I would just cut out the brace that was blocking me and reinstall the temporary bracing that has been temporary for about three years now. I trimmed and cleaned up those braces, got everything assembled and a test ride by 11:30. I hitched Sponge Bob to my truck and towed him home.
During the down time, the speedometer stopped working. It powers up and everything, just doesn't indicate. Also lost one of the deck driving lights.

The biggest concern is the brakes. They are weak. Pedal feel is good and they bled out perfectly, nice clean fluid. I adjusted the brakes as described in countless documents, and while it improved slightly, braking power is very low. The brakes on the old axles could easily skid the tires if you wanted them to. I could get a tiny skid on the gravel driveway, but basically, they can't skid.

Still, there was enough brake to stop and my GPS could tell us our speed, so we went to dinner on the trikes. Felt good to be back on the road!
While describing this issue to a guru, it suddenly occurred to me that I had purchased rear wheel cylinders. Makes sense, it's the rear wheels of the Beetle the axles come from. However, the rear brakes of any car are always weaker than the front. Otherwise, they would always skid.
I did a little research and found that (replacement) front wheel cylinders typically have a 7/8" bore, while rear cylinders have an 11/16" bore. That is 3/16" larger diameter in the front. Putting more math to it, the front cylinders have nearly 62% more surface area, which translates directly to 62% more transmitted force to the brake shoes for the same pedal effort. There is a corresponding reduction in cylinder travel, but that is of little consequence, so long as it moves the brake shoes enough. O'Reilly's in Decatur will have my two front wheel cylinders this afternoon :) though it may be a few days before I have time to put them in.
It occurs to me that the purple trike has the same hard pedal and limited brake action and I am 99% sure it's for the same reason. I certainly would not have thought to order front brake cylinders for rear wheels back then.

Monday, May 14, 2012

Order Up!

Transaxle is ready!

I can't pick it up today :(

Wednesday, May 9, 2012

Trans Spotting

It appears that the transaxle on Sponge Bob may be one of the semi-rare 1967-68 models. They are semi rare because a) they were only made for two years, b) most of them are still in serviceable cars and/or c) they are very desirable for trike building.

The reason for the narrow year range is that in 1967, they changed the electrical systems on Beetles to 12V and in 1969, they went to the IRS transaxle instead of the swingaxle. The change to 12V is important to the transaxle because they also changed the diameter of the flywheel from 180mm to 200mm. To fit a 12V flywheel that will mate properly with a 12V starter, a 6V transaxle needs some clearance ground away on the inside of the bell housing. That was done with Puff, and while I'm sure there is plenty of material, I'd rather have something that fits without modification.

There is really no such thing as a new VW transaxle, although some companies make high dollar aftermarket units that are all new, like Mendeola and Albins. These are mostly "call for pricing" priced, though I have seen a Weddle IRS transaxle priced at $7000.

Generally, freshly rebuilt swingaxles seem to run about $500, sometimes less.

I found a VW salvage yard that had a 12V swingaxle for $200. There is basically no warranty, though I'm sure if it was DOA, they would make it good.

So, way back in October of 2011, I picked it up. They were attending a swapmeet that was much closer to home than their place, and they were kind enough to bring it with them.

Then life got complicated. My mother-in-law became ill and eventually passed on. Thanksgiving and Christmas came and went. Within that whirlwind of activity, we moved, or technically, began to move, to a house in the country. It is a tremendous place on about 7.5 acres that has a nice house, a pond, a barn and workshop, horse pasture, several outbuildings.

Did you catch that? A workshop! An indoor workshop, with power and lights and a freakin' door. That closes.

Sadly, with Sponge Bob stuck in gear, I still have to work on it at the old place, under a carport, dodging mosquitoes.

Fast forward to March 2012. A close friend died suddenly. His birthday was May 5, so at his widow's request, we planned a memorial ride on his birthday. I was going to have Sponge Bob ready for her to ride with me in comfort, so as the date approached, I tore into preparing the transaxle I had picked up in October.

The brakes and such on Sponge Bob have always performed pretty well, but I couldn't get that monster hub nut broken loose. It goes on at 245 ft/lbs torque, so it's not infeasible to need 300-400 to break it loose.

My alternative was to get new wheel cylinders and hardware to go with the new brake shoes, seals and bearings I already head and just put all new stuff on the backing plate on the replacement. It came with hubs in reasonably good shape.


I ended up working out of town most of the week leading up to the ride, so when I got back into town Friday afternoon, I tore into it with the plan to get it on the road before Saturday morning, if I had to work all night. I came pretty close to that. I cleaned up and headed home (which is about a 45 minute drive now) about 3AM.

There was, however, no joy in Mudville.

One of the last steps before starting the engine was was to adjust the hydraulic clutch. I have done this enough times to make short work of it. I can get in the ballpark just by hauling on the release lever and taking up the slack in the cylinder adjuster. It usually needs just a little adjusting from there. Adjusting is easy; with the transaxle in gear, I push the clutch in with my left hand and kinda bounce the trike forward or back. If it bounces against the gears, tighten the clutch a bit and repeat until the trike rolls freely with the clutch in and bounces against the gears when the clutch is out. It kept bouncing. Having had the clutch too tight a couple times in the past and having it jump off the cross arm at full extension, I did a sanity check by slipping it into neutral then pushing on it. Oops, it bounced when it should have rolled.

Long story short [too late] this transaxle is stuck in a gear, too. First gear, by the other evidence. It doesn't matter what position the gear selector is in, it's in first. Well, except if you put it in 4th position; that locks the transaxle.

I borrowed a trike (which is kinda like borrowing someone's kidney only with more blood) and the ride proceeded with dignity and grace, though with great fatigue on my part.

Fed up with used parts, I have elected to get a rebuilt transaxle (with a warranty) from The Bug Stop. I dropped off the original stuck-in-forth unit at lunch today. I will remove the replacement stuck-in-first unit tonight for delivery tomorrow. They will mix and match my parts and their transaxle as appropriate and credit me for two cores, producing a ready to install transaxle for a reasonable price expected to be around $400 total.

With any luck, they will have it ready by this Friday and I will have Sponge Bob on the road by Saturday afternoon.

Between now and then, I will attempt to permanently repair a very old chassis and body problem on the trike, too.


Wednesday, October 12, 2011

Road Trip!

After we got back from Arkansas, I had a work project that took me four days of travel to a dozen cities, then we both had Friday off so we could go to Turner Falls for the Okie Twisters event there.

We still had a bit of finish up work to do on Kermit. We finished the wood, replaced the windshield, put on the new(ish) mirrors. He was ready to go by about 9AM Friday.


None of those oil spots in the driveway are from Kermit, but we will be coming back to that...

We had shopped continuously for a tent trailer and finally found one we could make a deal on. Friday morning, we met the guy at his house and decided that we did indeed like it. We had trouble finding the bank to get cash but got it and purchased the camper.


Sadly, this is the only picture I have of it at the moment.

It is a great little camper. It can go from attached to the trike to ready to occupy in two, maybe three, minutes. It came with a zipper-on side room that's actually bigger than the camper. It makes a pretty decent front porch, and only takes three poles and three guy ropes to set it up, adding about 10 minutes to the setup time, but I digress. As usual.

By the time we picked up the camper, some stuff we needed at the storage building and had run a few more errands, it was after 5PM on Friday and we were exhausted. We decided to go to bed early, get up REAL early and hit the road Saturday.

Up at 3AM, everything packed and ready, ice chest on the rack on the tongue of the camper and a few bits bungied to the top of it. We stopped to top off tanks and headed north on I35.

Stopped at the Loves just north of Denton to get beer and ice. Oklahoma is one of those states with no more than 3.2% alcohol in beer, unless you get it at a liquor store. It's not so much the alcohol content I am concerned with as just the taste. Beers that come with only 3.2% alcohol tend to be crappy lite beers, beers so bad they usually can't even spell "light". Those that do manage to spell it correctly still fall short on taste. Anyway, we got some decent beer and hit the road again; no problems thus far.

Exit at Ardmore to stretch legs and maybe get breakfast and on the exit ramp, both trikes had some kind of difficulty. Kermit had the throttle cable jump off the rollers. I reeeeally hate the way they did the throttle on that one and I *will* be changing that. However, that was a 2 second fix.

Sponge Bob was stuck in 4th gear. I hobbled him into the parking lot of the IHOP by way of a lot of clutch feathering. We decided to eat breakfast so he could cool off before I tried to work on it. Long story short, I found a group of nuts on the nose cone to be loose which could have allowed a lot of oil to leak out (remember the oil spots in the driveway? I did as soon as I realized the transaxle had been leaking and probably for a long time.) and/or the shifter input to have some play that could get the gears out of sequence.

I couldn't really seem to affect it, so I tightened everything that should have been tightened to begin with and we just got back on the highway heading north. It was just fine on the highway. Went the rest of the way to Davis and to the entrance of Turner Falls Park (where Sponge Bob had a major clutch failure year before last), through the gate, etc. Unfortunately, there is a substantial hill to climb and having lost my momentum at the base of it, I couldn't get up it.

We tried dropping the trailer, the hope being to get up the hill without it and have someone go get the trailer, but he couldn't make up the hill without the trailer, either. The clutch indicated it's grievances with that particularly rancid smoke that clutches do in these asbestos-free times. I don't give up easily, but I do know when it's time to.

Gabby went on and found some of our guys. Troop (and Lisa) and Sammy came down. We hooked the trailer up to Troop's trike and he hauled it on to the campsite and returned with a tow strap to pull me up. Once on flat ground, I could maneuver on my own.

We set up camp. The camper amazed all who saw it. The add on room requires guy lines to support it and the heavy wire tent stakes we had were essentially useless in the rocky ground where we set up. I tied the center one to a large tree root and managed to drive the other two in less than ideal locations, but it was adequate to hold the thing up.

We consumed a cool beverage or three and I set about a more serious attempt to beat Sponge Bob into submission. I removed the shifter from the nose cone so I could better feel what the hockey stick was doing inside. I found that I could manipulate it into a condition of semi-normalcy in which all gear positions except forth appeared to be attainable and perhaps most importantly, neutral  worked. I tried a test drive to find that in any position except neutral, the transmission was locked. Kinda like P for Park. In neutral, it properly freewheeled.

I continued to dink with it and got it back into "stuck in fourth" mode, and could indeed maneuver the trike somewhat. Basically, if we had no low speed hills or other such maneuvering to do, I could probably get the trike back home.

I was at that point still curious whether I could duplicate what I suspected had happened, that the loose nose cone allowed the hockey stick thing in to jump out of its normal timing and that maybe the proper motion to take it out of gear was simply not reachable until the hockey stick was returned to it's proper path. I supposed that I would need a jack to lift the transaxle while tilting the nosecone to get this "misalignment" to happen.

As I was cleaning up my mess, Rickey and Richard came by to check on me and see if I wanted their help to tear into it deeper. We discussed it a bit and in short decided to give it a whirl. Richard towed me to an RV pad adacent to his motor home and we tore into it.

The ladies went shopping for the main thing we were convinced we would need if we could affect a field repair at all, gear oil.

With much pulling, yanking and jacking, we were able to raise the nose of the transaxle enough to get the nose cone off. Sadly, we were only able to verify that, indeed, something inside the transaxle is amiss. The selector shafts were all in their proper positions, but the 3-4 shaft could not be moved into the 4th gear position and selecting any other position locked it up solid.

We finally cried uncle about the time Gabby and Marsha returned with gear oil and lunch. The new plan was that we would load Sponge Bob onto Richard's trailer and he would tow it home whilst I rode his trike.

We voraciously consumed our rotisserie chicken and headed back to our own camp just before the rains came.

It rained, on and off, for about 18 hours.

Yep, we spent pretty much the entire time at the event either working on Sponge Bob or napping in the camper because it was raining.

Well, that's not entirely true. We ventured out to borrow Troop's trike to go eat at The Cliff, a very yummy restaurant just outside the park. By the time we were about ready to head that way, that particular break in the rain was over, so we stayed and had hamburgers and hot dogs with the gang, which was more fun anyway.

The parade into town was canceled, but they did announce the various contest, race and trike game winners, all stuff we had missed during the day. They drew raffle tickets and 50/50 tickets, which we did manage to participate in. Roundman won first place rat trike... :)

As that was finishing up, it looked like it was going to start raining again, so we headed back to camp and were in bed and sorta sleeping by 9PM.

The camper performed very well, rain-wise. We had one window slightly open and a shift in the breeze made a little water come in, enough to run down a support pole and wet the bedding right next to my knees while I slept. A couple of seams seeped when water collected on top of them. So long as we were attentive to dumping the accumulation on occasion, we had a minimum of water inside.

The trip home was as good as could be expected. We had a convoy, Marsha on her trike, Gabby on Kermit, me on Richard's trike, Sammy on his trike and finally Richard in the motor home, towing Sponge Bob. We had a lot of wet road, but not a whole lot of actual precipitation.

It's unclear whether I was wet already when I put my rain suit on, had sweated profusely in the rain suit or had some leakage, but I was fairly damp in there. It was probably a combination of all three factors.

We had a couple of stops for breaks or fuel and split up on the north side of town, all heading to our various destinations.

After we got home and showered (you'd think we'd had enough water huh) and eaten, Gabby went to visit her Mom and I went to return Richard's trike and have him bring Sponge Bob home.

We immediately began searching for transaxles on Craigslist and by Tuesday, I had called all the local shops and gotten pricing on rebuilding/replacing it.

Found a few on Craigslist, spread from Austin, TX to Edmond, OK. Most were in the $150 range.

One local shop offers them for either $439 for a rebuilt unit of the shelf or $439 to rebuild your transaxle. I can see if someone wanted to preserve their serial numbers, etc, the "rebuild your unit" option would appeal, but for me, I'm just gonna be happy if it all bolts up and works right.

I hope to be able to work on it this weekend, but we'll see.
Tuesday, October 4, 2011

"I'll sleep when I'm dead" - Warren Zevon

We've been prepping and painting so much that there hasn't been time to update the poor neglected blog... or sleep... or mow... or laundry...

We both took a week vacation. The plan was to finish up the trike early in the week and take it somewhere, probably Arkansas, for the rest of the week.

Well, we kind of combined these two goals. We worked on the trike almost all week, realized we still weren't going to finish in time and went to Arkansas anyway.

When last I updated the blog, There was painting left to do. Suffice it to say that everything that was intended to be green (and a couple things that weren't) indeed became green, then became prismatic midcoated and clear top coated. All in all, we used four cans of green, 1 full can (an old half and a new half) of prism sparkly glitter stuff and two full cans of gloss clear.


Reassembly was a daunting task. I tried to avoid fixing everything as I reassembled it, especially wiring since I plan to rewire it anyway, but it's not easy to put something you don't like back in place when you have the skills and/or materials to upgrade it.


One place where I did not avoid repairing something was the fan/generator belt and pulley. After I discovered that the crankshaft pulley is welded on, I tried to replace the generator pulley to dress it up, but also to tighten up the very loose belt.


The generator pulley bent as easily as the crank pulley and also did not give. I had straightened it as best I could for the short term, but I knew it couldn't stay that way. PB Blaster, pulley puller and an appropriately sized socket for hammering the pulley back on (and perseverance), as well as purchasing the right sized belt,  paid off.


Since the fuel pump was moving anyway, I added a bigger filter, a cut off valve (the one on the tank doesn't appear to work) and a fuel pressure gauge.

Of course, it did little to help us that heavy rains came while we were trying to get the thing finished up Thursday evening.


It was shortly after the rains had subsided that we had gotten a bit more done that we decided we weren't going to make our reservation at Queen Willhelmina State Park Lodge if we didn't leave it at home. At first, we regeared towards taking the two currently running trikes, Gilbert and Sponge Bob, but in short order, decided that we'd just drive. We were both pretty tired to take on a 4-5 hour ride with a pretty short turnaround.

Sunday morning, back home and back at it.

The tank got replacement gauges. I had originally bought these for Puff, but ended up with a single multifunction instrument designed for motorcycles.

On the left is oil pressure, the right is a tachometer. I also replaced the two ugly indicator bulbs, which were both simply wired to keyed power, with some slick little bulbs that happen to be green. Not sure if they will both remain green, but they could...


The fuel door looks as incredible as I had expected....


The trunk required a bit of rework. All the racks were painted with "chrome" paint and occasionally put on with new hardware, where appropriate. Riveted the turn/tail lights back in. They will be wired soon.


 The wires need covering, too!! One feature we really liked was the use of an S&S air breather cover to hide the fuse block and some wiring behind. A bit of 1200 and 2000 grit sanding, followed by buffing with tripoli and the cover is nearly chrome bright.


Reassembling the pedals took longer than expected. Big surprise, huh? I disassembled the master cylinders and put on a coat of paint. Though not shown here, I rebuilt the throttle cable attachment. I still don't like that and it *will* be redesigned.


The new fric material was easy enough to stick down on nice clean paint :)


More to come...

Followers